

JavaScript 实现无缝循环滑动效果
本文介绍如何使用 JavaScript 手写实现页面顶部的图片循环滑动效果。通过监听触摸事件计算位移,利用 CSS transform 控制位置,并采用首尾复制法解决边界跳转问题。详细解析了滑动过程中的回弹逻辑、过渡效果控制及边界判断,提供完整代码实现。
循环滑动需求背景
近期业务开发中遇到一个常见需求:页面顶部需展示图片列表,支持用户拖动操作。当拖动至最后一张图片时,需实现无缝切换至第一张图片的效果,从而形成循环滑动体验。
此类交互场景在主流应用中十分普遍,例如淘宝、网易云音乐等应用的顶部区域均采用这种滑动模式。
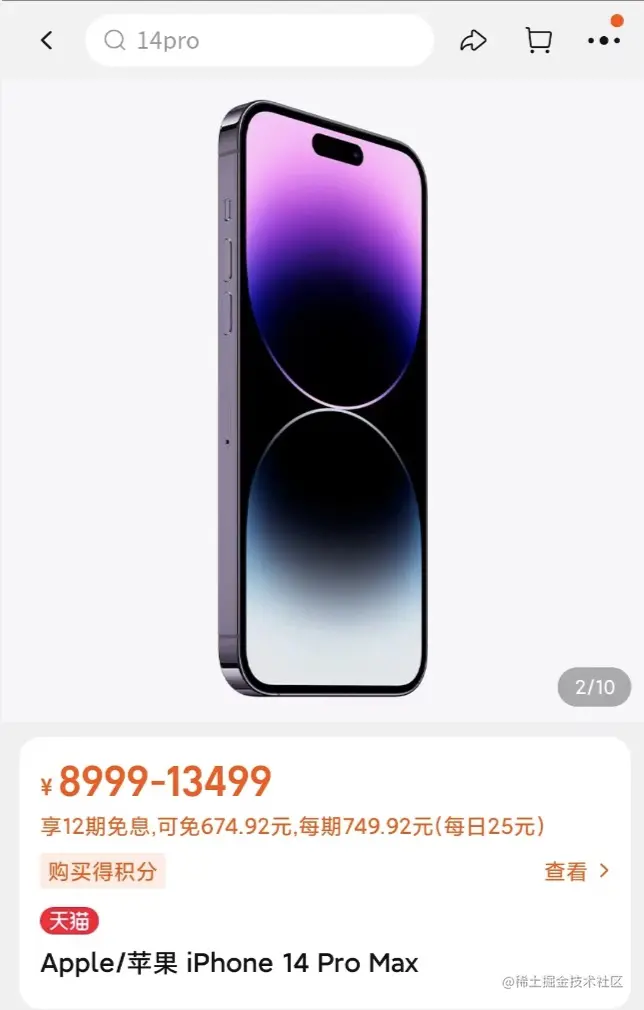
若无需实现循环滑动功能,仅使用 css 属性即可满足基本需求。
具体实现为:父元素设置固定宽度,并配置 overflow-x:auto 属性。子元素具备各自宽度,横向排列即可正常显示。
然而,一旦要求实现循环滑动,或者无法使用 overflow 属性,实现难度将显著增加。
此时需要手动编写滑动逻辑代码。
触摸事件监听与位移计算
具体步骤包括:1. 监听 touch 相关事件,具体为 touchStart、touchMove 和 touchEnd,通过事件参数计算位移量。
let start = 0, move = 0, end = 0
const touchStart = (e) => {
// 计算滑动的起点,同时需要保存上一次的停留的位置
start = e.touches[0].clientX - end
}
const touchMove = (e) => {
// 记录滑动的距离
move = e.touches[0].clientX - start
}
const touchEnd = () => {
// 记录结束滑动的位置
end = move
}2. 将计算得到的位移值应用于父元素,例如使用样式代码: transform: translateX(${transform}px)。
<div className={cx('swapper')}
       onTouchStart={touchStart}
       onTouchMove={touchMove}
       onTouchEnd={touchEnd}
       style={{ transform: `translateX(${transform}px)`, transition: transition ? 'transform 0.3s' : 'none' }}
   >
       {
           list.map((item, index) => {
           return <div></div>
           })
        }
        </div>
首尾复制与边界跳转逻辑
当滑动至最后一张图片时,需实现跳转至第一张图片的效果,以达成首尾无缝衔接。
实现方法为:1. 将列表中的第一张图片复制一份,追加到列表末尾;同时将最后一张图片复制一份,插入到列表开头。
if (length > 1) {
    const startItem = list[0]
    const endItem = list[length - 1]
    list.push(startItem)
    list.unshift(endItem)
}
2. 在滑动过程中启用弹性回弹效果。例如,当卡片滑动至一半位置时,需计算其距离最近卡片的节点。假设卡片宽度一致,节点坐标可表示为 [-750, -375, 0, 375] 等值。
const length = list.length
    const boundary = []
    const width = document.body.clientWidth
    for (let i = -length; i <= length - 1; i++) {
        boundary.push(i * width)
    }
在滑动结束时,需判断当前位移距离左侧卡片还是右侧卡片更近。
for (let i = 1; i < boundary.length; i++) {
     // 最后卡片结束的位置在某个区间之内
    if (end > boundary[i - 1] && end < boundary[i]) {
        // 通过减法判断下距离左边还是距离右边更近
        if (end - boundary[i - 1] < boundary[i] - end) {
            end = boundary[i - 1]
            // 设置最终的位置
            setTransform(boundary[i - 1])
        } else {
            end = boundary[i]
            setTransform(boundary[i])
        }
        break
    }
}
过渡效果与回弹控制
回弹动画需要添加过渡效果,但在滑动过程中应移除过渡效果以保证跟手性。因此,在 touchMove 阶段移除 transition 属性,而在 touchEnd 阶段重新开启过渡效果。
滑动结束后,需判断是否到达边界情况:若处于最后一张,需跳转至第一张。需注意,此时跳转不应包含过渡效果,以确保视觉上的无缝连接。
if (end < boundary[0]) {
    end = boundary[0]
    setTransform(end)
}
if (end > boundary[boundary.length - 1]) {
    end = boundary[boundary.length - 1]
    setTransform(end)
}
setTimeout(() => {
    // 关闭过渡效果
    setTransition(false)
    // 如果是第二张,需要跳转到倒数第二张
    if (end < boundary[1]) {
        end = boundary[boundary.length - 2]
        setTransform(end)
    }
    // 如果是倒数第二张,需要跳转到第二张
    // 确保滑动的图片都在中间,而不是在列表的第一张和最后一张
    if (end > boundary[boundary.length - 2]) {
        end = boundary[1]
        setTransform(end)
    }
    // 300 是因为需要等待回弹动画结束
}, 300);
完整代码实现
以下是完整的代码实现示例。
// 必须要放在组件外
let start = 0, move = 0, end = 0
const cx = classBind.bind(styles);
const Component = (props) => {
    const { arr = [] } = props
    const [list, setList] = useState(arr)
    // 控制位移
    const [transform, setTransform] = useState(0)
    // 控制过渡效果
    const [transition, setTransition] = useState(false)
    // 记录初始位置
    const touchStart = (e) => {
        start = e.touches[0].clientX - end
    }
    // 计算位移
    const touchMove = (e) => {
        move = e.touches[0].clientX - start
        setTransition(false)
        setTransform(move)
    }
    // 结束后计算回弹,和边界情况
    const touchEnd = () => {
        setTransition(true)
        const length = list[0].listLength
        const boundary = []
        const width = document.body.clientWidth
        for (let i = -length; i <= length - 1; i++) {
            boundary.push(i * width)
        }
        end = move
        if (end < boundary[0]) {
            end = boundary[0]
            setTransform(end)
        }
        if (end > boundary[boundary.length - 1]) {
            end = boundary[boundary.length - 1]
            setTransform(end)
        }
        setTimeout(() => {
            setTransition(false)
            if (end < boundary[1]) {
                end = boundary[boundary.length - 2]
                setTransform(end)
            }
            if (end > boundary[boundary.length - 2]) {
                end = boundary[1]
                setTransform(end)
            }
        }, 300);
        for (let i = 1; i < boundary.length; i++) {
            if (end > boundary[i - 1] && end < boundary[i]) {
                if (end - boundary[i - 1] < boundary[i] - end) {
                    end = boundary[i - 1]
                    setTransform(boundary[i - 1])
                } else {
                    end = boundary[i]
                    setTransform(boundary[i])
                }
                break
            }
        }
    }
    useEffect(() => {
            const { length } = list
            list.forEach((item, index) => {
                // 保存真实的位置,因为后面会补充前后两张卡片
                item.activeKey = index
                // 保存真实的列表长度,不直接减2是因为有1张卡片的情况
                item.listLength = length
            })
            if (length > 1) {
                const startItem = list[0]
                const endItem = list[length - 1]
                list.push(startItem)
                list.unshift(endItem)
            }
            setList([...list])
        })
    }, [arr]);
    return <div className={cx('resource-detail')}>
        <div className={cx('swapper')}
            onTouchStart={touchStart}
            onTouchMove={touchMove}
            onTouchEnd={touchEnd}
            style={{ transform: `translateX(${transform}px)`, transition: transition ? 'transform 0.3s' : 'none' }}
        >
            {
                list.map((item, index) => {
                    return <div key={index}>这是卡片</div>
                })
            }
        </div>
    </div>
}
至此,关于 JavaScript 实现手写循环滑动效果的讲解结束。如需了解更多 JavaScript 循环滑动相关内容,建议查阅本站往期文章或继续浏览后续相关文章。感谢大家的支持!
anime.js 快速入门:怎么引入库并编写第一个 DOM 动画
2026-11-05 14:22:43
在线JS解密后变量名仍乱码?结合浏览器DevTools调试还原
2026-11-04 20:26:01
怎么在浏览器中运行JavaScript代码并查看输出结果
2026-11-04 09:07:33
JS 获取屏幕分辨率:window.screen.width 与 height 用法
2026-11-04 08:52:48
为什么推荐用DOMContentLoaded代替window.onload初始化JS
2026-11-04 08:42:33