

原生JS实现手动控制图片轮播:ScrollPicLeft.js库详解
作者:拾光时间:2026-10-29 16:35:59浏览:582
本文介绍如何使用ScrollPicLeft.js库实现无需jQuery的原生JavaScript图片轮播效果。该组件支持通过左右箭头按钮手动控制图片翻页,适用于证书展示或商品推荐等场景。文章提供了详细的初始化配置参数说明及完整HTML/JS代码示例,帮助开发者快速集成手动控制功能的图片展示模块。
ScrollPicLeft.js手动轮播效果介绍
借助ScrollPicLeft.js库,可以实现图片的前后手动切换功能,该方案适用于网页中的证书展示、推荐商品等栏目。与传统的marquee滚动效果不同,此方法允许用户通过点击前后切换箭头按钮来手动翻页,从而浏览上一张或下一张图片。该方案无需调用jQuery,初始化过程简单,使用便捷。
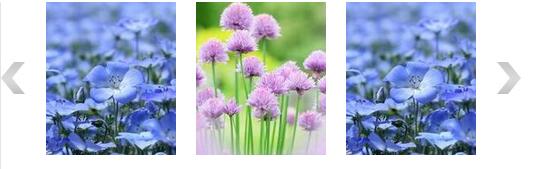
相关JavaScript代码实现如下:
JavaScript初始化配置代码
<script type="text/javascript">
 var scrollPhoto = new ScrollPicleft();
 scrollPhoto.scrollContId = "ISL_Photo"; // 内容容器ID""
 scrollPhoto.arrLeftId = "Left_Photo";//左箭头ID
 scrollPhoto.arrRightId = "Right_Photo"; //右箭头ID
 scrollPhoto.frameWidth = 450;//显示框宽度
 scrollPhoto.pageWidth = 150; //翻页宽度
 scrollPhoto.speed = 10; //移动速度(单位毫秒,越小越快)
 scrollPhoto.space = 10; //每次移动像素(单位px,越大越快)
 scrollPhoto.autoPlay = false; //自动播放
 scrollPhoto.autoPlayTime = 3; //自动播放间隔时间(秒)
 scrollPhoto.initialize(); //初始化
</script>
本文实例详细解析了JS图片轮播的手动切换效果。该实现过程简洁,旨在为读者提供一份可直接参考的代码示例。具体的JS代码实现如下所示:
HTML结构与样式代码
<head>
<meta http-equiv="Content-Type" content="text/html; charset=utf-8" />
<title>js图片轮播手动切换效果</title>
<script type="text/javascript" src="js/ScrollPicLeft.js"></script>
<style>
html,body,ul,li{margin:0; padding:0;}
ul,li{ list-style:none;}
.dd_main{ width:520px;}
.zl_left { width:35px; float:left; text-align:left; padding-top:60px}
.zl_right { width:35px; float:right; text-align:right; padding-top:60px}
.zl_content { width:450px; height:153px; float:left; overflow:hidden;}
.zl_content ul li { width:130px; padding:0 10px; text-align:center; float:left;}
.welcome{ position:fixed; width:100%; text-align:center; bottom:30px;}
.welcome a{ color:#0350B8;}
</style>
</head>

<body>
<div class="dd_main">
 <div class="zl_left" id="Left_Photo"><a href="javascript:void(0)"><img src="images/zl_tb1.jpg" width="24" height="32" /></a></div>
 <div class="zl_content">
 <ul id="ISL_Photo">
 <li><img src="images/zl_tp.jpg" width="130" height="153" /></li>
 <li><img src="images/zl_tp.jpg" width="130" height="153" /></li>
 <li><img src="images/zl_tp.jpg" width="130" height="153" /></li>
 <li><img src="images/zl_tp.jpg" width="130" height="153" /></li>
 <li><img src="images/zl_tp.jpg" width="130" height="153" /></li>
 <li><img src="images/zl_tp.jpg" width="130" height="153" /></li>
 <li><img src="images/zl_tp.jpg" width="130" height="153" /></li>
 </ul>
 </div>
 <div class="zl_right" id="Right_Photo"><a href="javascript:void(0)"><img src="images/zl_tb2.jpg" width="24" height="32" /></a></div>
</div>
<script type="text/javascript">
 var scrollPhoto = new ScrollPicleft();
 scrollPhoto.scrollContId = "ISL_Photo"; // 内容容器ID""
 scrollPhoto.arrLeftId = "Left_Photo";//左箭头ID
 scrollPhoto.arrRightId = "Right_Photo"; //右箭头ID
 scrollPhoto.frameWidth = 450;//显示框宽度
 scrollPhoto.pageWidth = 150; //翻页宽度
 scrollPhoto.speed = 10; //移动速度(单位毫秒,越小越快)
 scrollPhoto.space = 10; //每次移动像素(单位px,越大越快)
 scrollPhoto.autoPlay = false; //自动播放
 scrollPhoto.autoPlayTime = 3; //自动播放间隔时间(秒)
 scrollPhoto.initialize(); //初始化
</script>
</body>
</html>
源码下载:js图片轮播手动切换效果
精彩专题分享:jQuery图片轮播 JavaScript图片轮播 Bootstrap图片轮播
以上分享的JS图片轮播手动切换效果代码,希望能对大家有所帮助,并应用于实际开发实践中。
作者最新文章
JS处理含Emoji或中文的字符串转数组乱码问题
2026-11-05 16:12:28
JS怎么使用展开运算符合并对象
2026-11-05 14:42:18
ES6+环境下判断JS对象为空的简洁写法
2026-11-05 12:12:23
怎么通过replacer函数自定义JS中JSON的格式化输出
2026-11-05 11:19:44
JS正则表达式基础:字面量与RegExp构造函数的区别及常用元字符
2026-11-05 11:16:58