

HarmonyOS Canvas 实现动态粗细手绘板
本文介绍如何在 HarmonyOS 中利用 Canvas 组件实现手绘板功能。通过监听触摸事件,结合移动速度与距离计算线条粗细,并对比 lineCap 属性效果,最终实现速度越快线条越细的动态绘制体验。
前言
近期在研究 openHarmony 开发,结合此前对 canvas 技术的了解,本文分享一个基于 HarmonyOS 内置 Canvas 组件实现的手绘板应用案例。
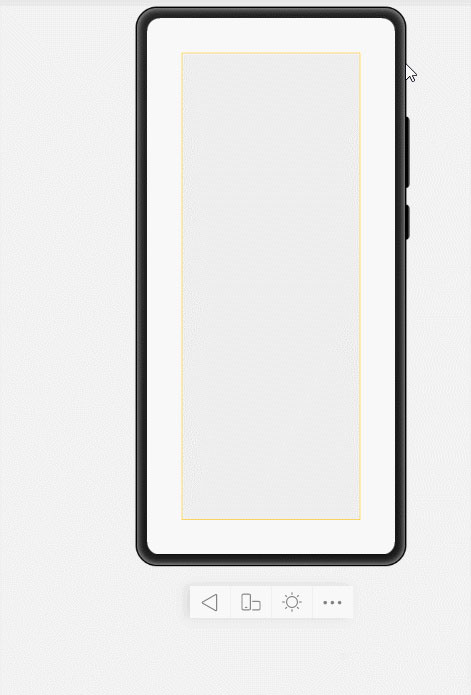
该手绘板支持根据屏幕滑动速度动态调整线条粗细。当用户手指触碰屏幕时开始绘制,且滑动速度越快,生成的线条越细。
效果展示
原理分析
1.绘制原理
在开始编码前,建议先熟悉 Canvas 组件的基本用法,HarmonyOS 开发者文档对此有详尽介绍,此处不再赘述。
首先,需获取 Canvas 上下文对象,并将其绑定到触摸移动事件中,因为线条的生成依赖于用户的触摸操作。
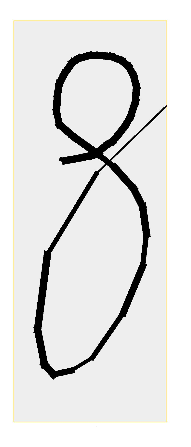
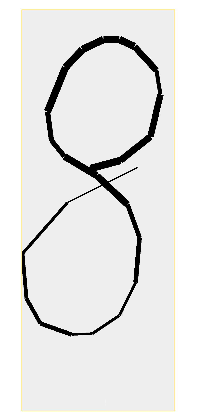
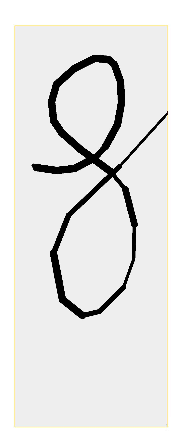
其次,设置 lineCap 属性,该属性支持 butt、round 和 square 三种值。经测试,round 效果最佳。
当属性值为 butt 时的显示效果:
当属性值为 round 时的显示效果:
当属性值为 square 时的显示效果:
虽然 butt 模式也可用,但锯齿感较强。尽管 API 提供抗锯齿选项,但设置后似乎无效,可能因渲染粒度较大导致卡顿,进一步减小粒度可能会加剧性能问题。
因此最终选择 round 模式,该模式使线条末端呈圆形,视觉效果更为圆润平滑。
最后,从坐标数组中取出最后一个值作为 moveTo 的起点,将鼠标移动后的新坐标作为 lineTo 的终点,调用 stroke 方法即可绘制出图像。
绘制直线通常使用 moveTo() 和 lineTo() 两个方法。moveTo() 用于将画笔移至指定点并作为直线起点,lineTo() 则定义直线的终点。
        const el = this.$refs.canvas;
        this.ctx = el.getContext('2d')
        this.ctx.lineWidth =this.lineWidth/2
        this.ctx.beginPath()
        // 向线条的每个末端添加圆形线帽。
        this.ctx.lineCap = 'square'
        // 每次将数组中最后一个值取出,作为起始点
        this.ctx.moveTo(this.ArrX[this.ArrX.length-1],this.ArrY[this.ArrY.length-1])
        this.ctx.lineTo(e.touches[0].localX,e.touches[0].localY)
        this.ctx.stroke()
        this.ArrX.push(e.touches[0].localX)
        this.ArrY.push(e.touches[0].localY)
2.线条粗细
要实现通过速度控制线条粗细,需获取两点间的时间差,结合距离计算速度。
触发 touchmove 事件时,记录当前时间戳。通过当前触发事件的时间减去上一次触发事件的时间,得到两次事件的时间间隔,即两点间的时间差。
接着计算两点间的距离(平方和开根号),通过 路程/时间 = 速度 计算出两点间的速度,从而动态生成线条粗细。
        // 计算线条粗细
        const currTime = Date.now()
        if(this.startTime !== 0){
            const duration = currTime - this.startTime
            // 传入倒数第二个点和最后一个点,和持续时间,会返回加速度
            const v = this.speed(this.ArrX[this.ArrX.length-2],this.ArrY[this.ArrY.length-2],this.ArrX[this.ArrX.length-1],this.ArrY[this.ArrY.length-1],duration)
            this.lineWidth =   this.lineWidth/v
            if(this.lineWidth>25){
                this.lineWidth = 25
            }
            if(this.lineWidth<1){
                this.lineWidth = 1
            }
        }
        this.startTime = currTime
完整代码
index.js
// @ts-nocheck
export default {
    data: {
        ctx:'',
        ArrX:[],
        ArrY:[],
        //        开始时间
        startTime:0,
        lineWidth:14
    },
    // 偏移很多
    touchstart(e){
        //        开始时间清空
        this.startTime = 0
        this.ArrX.push(e.touches[0].localX)
        this.ArrY.push(e.touches[0].localY)
    },
    //    计算最后两点的速度
    speed(x1,y1,x2,y2,s){
        const x = Math.abs(x1-x2)*Math.abs(x1-x2)
        const y = Math.abs(y1-y2)*Math.abs(y1-y2)
        return Math.sqrt(x+y)/s
    },
    touchmove(e){
        // 计算线条粗细
        const currTime = Date.now()
        if(this.startTime !== 0){
            const duration = currTime - this.startTime
            // 传入倒数第二个点和最后一个点,和持续时间,会返回加速度
            const v = this.speed(this.ArrX[this.ArrX.length-2],this.ArrY[this.ArrY.length-2],this.ArrX[this.ArrX.length-1],this.ArrY[this.ArrY.length-1],duration)
            this.lineWidth =   this.lineWidth/v
            if(this.lineWidth>25){
                this.lineWidth = 25
            }
            if(this.lineWidth<1){
                this.lineWidth = 1
            }
        }
        this.startTime = currTime

        const el = this.$refs.canvas;
        this.ctx = el.getContext('2d')
        this.ctx.lineWidth =this.lineWidth/2
        this.ctx.beginPath()
        // 向线条的每个末端添加圆形线帽。
        this.ctx.lineCap = 'square'
        // 每次将数组中最后一个值取出,作为起始点
        this.ctx.moveTo(this.ArrX[this.ArrX.length-1],this.ArrY[this.ArrY.length-1])
        this.ctx.lineTo(e.touches[0].localX,e.touches[0].localY)
        this.ctx.stroke()
        this.ArrX.push(e.touches[0].localX)
        this.ArrY.push(e.touches[0].localY)
    },
    touchend(e){
        this.startTime = 0
    }
}
index.hml
<div class="container">
    <canvas ref="canvas" class="canvas" @touchstart="touchstart"
            @touchmove="touchmove" @touchend="touchend"/>
</div>
index.css
.container{
    margin: 50px;
}
.canvas{
    height: 100%;
    width: 100%;
    background-color: #eee;
    border: 1px solid #ffc300;
}
总结
不足之处:当前使用体验仍有优化空间,后续需进一步改进。
最后,通过自定义组件的开发,加深了对 HarmonyOS 的理解,旨在共同建设鸿蒙生态。
至此,关于 JavaScript+HarmonyOS 实现手绘板的介绍结束。如需了解更多 JavaScript 手绘板相关内容,请搜索本站往期文章或继续浏览后续文章,感谢支持!
anime.js 快速入门:怎么引入库并编写第一个 DOM 动画
2026-11-05 14:22:43
在线JS解密后变量名仍乱码?结合浏览器DevTools调试还原
2026-11-04 20:26:01
怎么在浏览器中运行JavaScript代码并查看输出结果
2026-11-04 09:07:33
JS 获取屏幕分辨率:window.screen.width 与 height 用法
2026-11-04 08:52:48
为什么推荐用DOMContentLoaded代替window.onload初始化JS
2026-11-04 08:42:33