

JavaScript 实现简易图片自动轮播功能
作者:闭包旅人时间:2026-10-23 22:39:39浏览:196
本文提供了一段使用 JavaScript 实现的简易图片自动轮播代码示例,展示了基本的 HTML 结构与样式设置,旨在为学习者提供直观的参考。
JS 实现简易图片自动轮播
本文分享了一段使用 JavaScript 实现的简易图片自动轮播的具体代码,供读者参考学习。
<!doctype html>
<html>
 <head>
 <meta charset="utf-8" />
 <title>自动播放选项卡</title>
 <style>
 *{
 margin:0;
 padding:0;
 }

 .box{
 width:600px;
 height:400px;
 border:1px solid red;
 margin:100px auto;
 position:relative;
 }

 a{
 font-size:40px;
 position:absolute;
 text-decoration:none;
 top:-10px;
 }
 #prev{

 left:0;
 }
 #next{

 right:0;

 }
 #pos{
 margin-left:30px;
 }
 input{
 width:90px;
 height:40px;
 float:left;
 outline:none;
 border:0;
 }
 .box div{
 width:600px;
 height:400px;
 background:skyblue;
 text-align:center;
 line-height:300px;
 font-size:100px;
 font-weight:bold;
 text-shadow:5px 5px 5px #f90;
 display:none;
 }

 .box .show{
 display:block;
 }
 .box .active{
 width:88px;
 color:#fff;
 font-size:18px;
 font-weight:bold;
 background:#f90;
 }
 </style>
 <script>
 window.onload = function()
 {
 var oBox = document.getElementById('box');
 var oPrev = document.getElementById('prev');
 var oNext = document.getElementById('next');
 var aBtn = document.getElementsByTagName('input');
 var aDiv = oBox.getElementsByTagName('div');
 var oNow = 0;

 for (var i=0;i<aBtn.length;i++) {
 aBtn[i].dataIndex = i;

 aBtn[i].onclick = function(){

 oNow = this.dataIndex;

 for (var i=0;i<aBtn.length;i++) {
 aBtn[i].className = '';
 aDiv[i].className = '';
 }
 this.className = 'active';
 aDiv[this.dataIndex].className = 'show';
 }
 }

 oPrev.onclick = prev;
 oNext.onclick = next;

 //实现自动播放
 var timer = setInterval(next , 1000);

 oBox.onmouseover = function()
 {
 clearInterval(timer);
 }

 oBox.onmouseout = function()
 {
 timer = setInterval(next , 1000);
 }


 function prev()
 {
 oNow--;
 if (oNow < 0) {
 oNow = aBtn.length-1;
 }
 tab();
 }

 function next()
 {
 oNow++;
 if (oNow > aBtn.length-1) {
 oNow = 0;
 }

 tab();

 }

 function tab()
 {
 for (var i=0;i<aBtn.length;i++) {
 aBtn[i].className = '';
 aDiv[i].className = '';
 }
 aBtn[oNow].className = 'active';
 aDiv[oNow].className = 'show';
 }


 }
 </script>
 </head>

 <body>
 <div class="box" id="box">
 <a href="javascript:;" id="prev">☜</a>
 <a href="javascript:;" id="next">☞</a>
 <input type="button" name="" value="亚洲" class="active" id="pos"/>
 <input type="button" name="" value="欧洲" />
 <input type="button" name="" value="非洲" />
 <input type="button" name="" value="北美洲" />
 <input type="button" name="" value="南美洲" />
 <input type="button" name="" value="大洋洲" />
 <div class="show">亚洲</div>
 <div>欧洲</div>
 <div>非洲</div>
 <div>北美洲</div>
 <div>南美洲</div>
 <div>大洋洲</div>
 </div>
 </body>
</html>
具体展示效果如下:
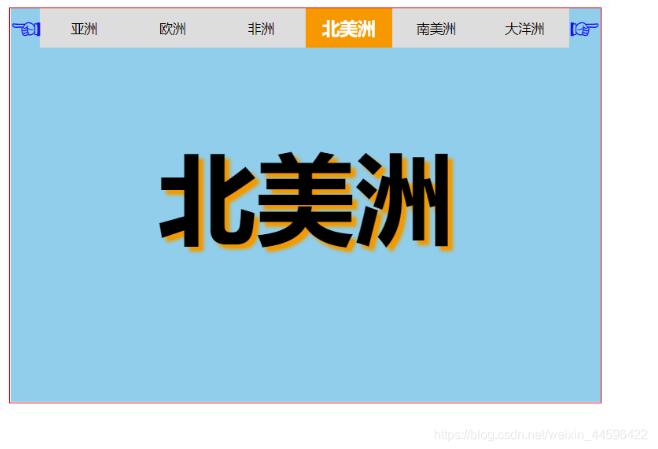
此外,本站还提供精彩专题分享,包括 jQuery 图片轮播、JavaScript 图片轮播以及 Bootstrap 图片轮播等内容。
以上就是本文的全部内容,希望这段代码能对各位的学习有所帮助,同时也欢迎大家多多支持本站。
作者最新文章
什么时候该用JS构造器:与工厂模式、字面量的选择对比
2026-11-05 16:18:22
推荐几款轻量级JS照片墙开源库及对比
2026-11-05 15:56:19
JavaScript递归写法有哪些常见陷阱及避免方法
2026-11-05 14:53:38
JS数组浅拷贝与深拷贝怎么选?场景与方法总结
2026-11-05 14:41:02
p5.js 中 setup() 和 draw() 函数的执行机制详解
2026-11-05 12:32:38