

原生JavaScript实现轮播图:自动播放与交互控制
本文详细介绍如何使用原生JavaScript实现一个功能完整的左右轮播图组件。内容涵盖自动播放、点击焦点切换以及左右按钮切换三大核心功能。通过克隆首尾元素解决视觉卡顿,利用定时器实现自动轮播,并处理鼠标交互、切屏及快速点击导致的定时器混乱问题,提供完整的布局、样式及JS代码示例。
轮播图功能概述与效果展示
本文提供了使用JavaScript实现左右轮播图的具体代码示例,供读者参考学习。
该轮播图组件具备三项主要功能:自动播放、点击焦点切换以及点击左右按钮切换。
以下是轮播图的最终效果展示。
自动轮播效果演示。
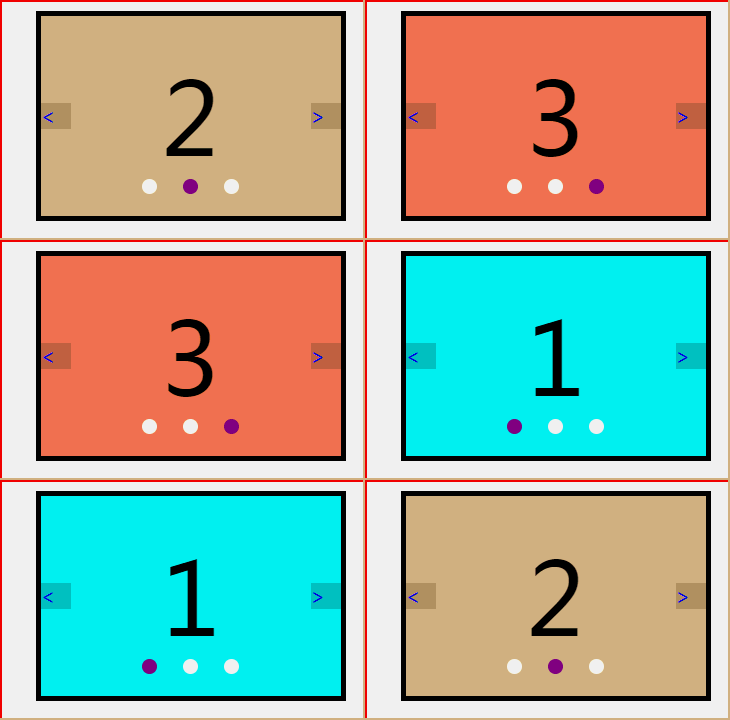
点击焦点进行切换的效果演示。
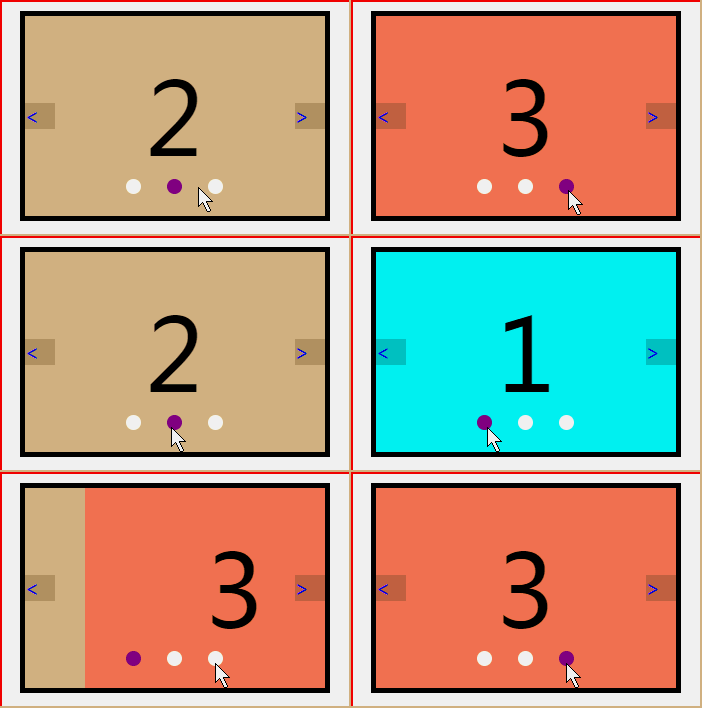
点击左右箭头按钮进行切换的效果演示。
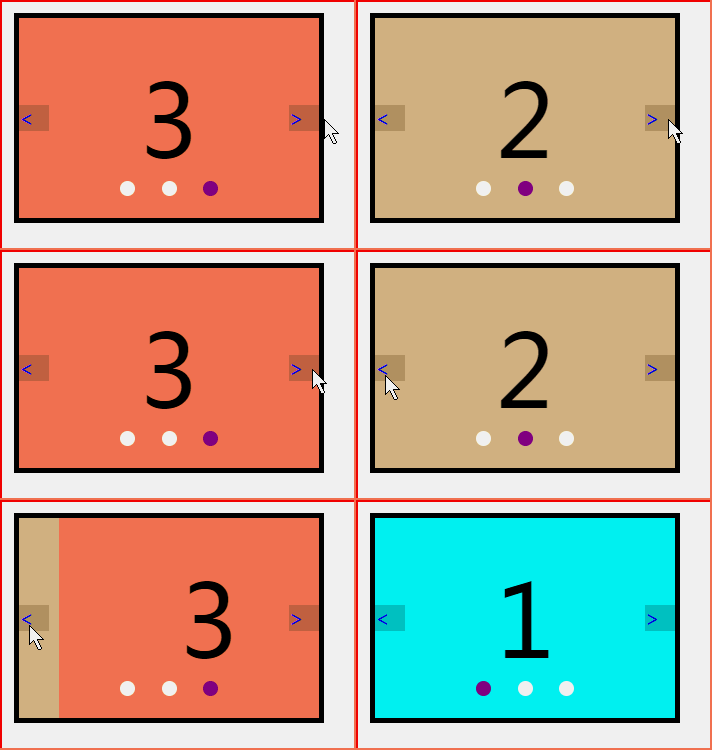
注意:本文示例中使用带有背景颜色的li标签来模拟图片占位。在实际应用中,可将真实图片插入到li标签内部。
实现思路与布局样式
实现思路概述。
1. 基础布局与CSS样式: (1)将存放轮播图片的容器设置为绝对定位。 (2)复制第一张图片置于容器末尾,同时复制最后一张图片置于容器最前,以确保左右滑动时的无缝衔接效果,避免视觉卡顿。 (3)通过移动容器位置实现图片切换动画,并设置定时器以完成自动轮播。 (4)配置鼠标悬停暂停播放事件、左右按钮点击事件以及焦点点击事件。 (5)处理快速点击导致的定时器混乱问题,以及切屏后定时器状态异常的问题。
一、HTML布局结构
<!-- 布局 -->
<section>
<ul>
<li style="background-color:aqua;">1</li>
<li style="background-color: burlywood;">2</li>
<li style="background-color: coral;">3</li>
</ul>
<ol></ol>
<div>
<a href=""><</a>
<a href="">></a>
</div>二、CSS样式设计
* {
 margin: 0;
 padding: 0;
 }

 ul,
 ol,
 li {
 list-style: none;
 }

 a {
 text-decoration: none;
 }

 section {
 width: 300px;
 margin: 30px auto;
 height: 200px;
 border: 5px solid;
 position: relative;
 /* overflow: hidden; */
 }

 ul {
 width: 300%;
 height: 100%;
 text-align: center;
 line-height: 200px;
 font-size: 100px;
 position: absolute;
 top: 0;
 left: 0;
 }

 li {
 width: 300px;
 height: 100%;
 float: left;
 }

 ol {
 width: 150px;
 height: 20px;
 position: absolute;
 bottom: 20px;
 left: 50%;
 transform: translateX(-50%);
 border-radius: 15px;
 display: flex;
 justify-content: space-evenly;
 align-items: center;
 }

 ol li {
 width: 15px;
 height: 15px;
 background-color: ivory;
 border-radius: 50%;
 }

 .active {
 background-color: greenyellow;
 }
JavaScript核心代码实现
三、原生JavaScript实现逻辑
1. 获取DOM元素
//1、获取盛放图片的盒子和盛放焦点的盒子
 let ul = document.querySelector('ul')
 let ol = document.querySelector('ol')
 //获取大盒子和大盒子的宽
 let wrap = document.querySelector('section')
 let wrap_width = wrap.clientWidth
2. 动态生成焦点指示器
const frg = document.createDocumentFragment()
 for (let i = 0; i < ul.children.length; i++) {
 let focus = document.createElement('li')
 frg.appendChild(focus)
 //焦点初始化
 if (i == 0) focus.className = 'active'
 }
 ol.appendChild(frg)
3. 克隆首尾元素以实现无缝滚动
通过克隆元素并调整其位置,确保页面初始加载时显示第一张图片。同时调整容器宽度以适配所有图片。
let first = ul.firstElementChild.cloneNode(true)
let last = ul.lastElementChild.cloneNode(true)
ul.appendChild(first)
ul.insertBefore(last, ul.firstElementChild)
ul.style.width = ul.children.length * 100 + '%'
ul.style.left = -wrap_width + 'px'
4. 启动自动轮播逻辑
//设置一个图片索引
 let index = 1
 //一会儿会用到这段代码,就直接封装成函数了
 autoplay()
//自动播放函数,每隔两秒切换一次图片
 function autoplay() {
 move_time = setInterval(() => {
 index++
 move(ul, 'left', -index * wrap_width, movend)
 }, 2000)
 }
 //运动函数,设置图片切换方式
 //参数ele,元素;type,元素属性;value,元素运动结束时属性值;cb(),元素运动结束函数
 function move(ele, type, value, cb) {

 //获取元素属性初始值
 let spe = parseInt(getComputedStyle(ele)[type])
 //元素属性改变过程
 change_timer = setInterval(() => {
 value > spe ? spe += 5 : spe -= 5
 ele.style[type] = spe + 'px'
 if (value > spe) {
  if (spe >= value) {
  clearInterval(change_timer)
  cb()
  }
 } else {
  if (spe <= value) {
  clearInterval(change_timer)
  cb()
  }
 }
 }, 10)
 }
 //运动结束函数
 //判断索引临界值,更改索引,更改盒子位置,使图片轮播
 //让焦点和图片配套
 function movend() {
 if (index >= ul.children.length - 1) {
 index = 1
 ul.style.left = -index * wrap_width + 'px'
 }
 if (index <= 0) {
 index = ol.children.length - 1
 ul.style.left = -index * wrap_width + 'px'
 }
 for (let i = 0; i < ol.children.length; i++) {
 ol.children[i].className = ''
 }
 ol.children[index - 1].className = 'active'
 }
5. 鼠标移入暂停播放,移出恢复播放
wrap.onmouseover = () => clearInterval(move_time)
 wrap.onmouseout = () => autoplay()
6. 左右按钮点击切换图片逻辑
 //获取左右按钮
 let left = document.querySelector('div').firstElementChild
 let right = document.querySelector('div').lastElementChild
 //点击左按钮,索引减少,图片切到上一张
 left.onclick = function() {
 index--
 move(ul, 'left', -index * wrap_width, movend)
 }
 //点击右按钮,索引增加,图片切到下一张
 right.onclick = function() {
 index++
 move(ul, 'left', -index * wrap_width, movend)
 }
7. 焦点点击切换图片逻辑
for (let i = 0; i < ol.children.length; i++) {
 //获取焦点索引
 ol.children[i].id = i
 //点击焦点切换图片
 ol.children[i].onclick = function() {
 index = this.id - 0 + 1
 move(ul, 'left', -index * wrap_width, movend)
 }
 }
8. 解决切屏后定时器状态混乱问题
9. 解决快速点击导致的定时器混乱问题
引入开关变量控制动画执行。点击前关闭开关,图片切换过程中保持开启,切换完成后重新打开开关。将相关逻辑嵌入点击事件函数中即可实现防抖效果。
if (flag) return
flag = true
完整代码示例
四、完整代码汇总
<!DOCTYPE html>
<html lang="en">
<head>
<meta charset="UTF-8">
<meta name="viewport" content="width=device-width, initial-scale=1.0">
<meta http-equiv="X-UA-Compatible" content="ie=edge">
<title>轮播图21</title>
<style>
* {
margin: 0;
padding: 0;
}
ul,
ol,
li {
list-style: none;
}
a {
text-decoration: none;
}
section {
width: 300px;
margin: 30px auto;
height: 200px;
border: 5px solid;
position: relative;
overflow: hidden;
}
ul {
width: 300%;
height: 100%;
text-align: center;
line-height: 200px;
font-size: 100px;
position: absolute;
top: 0;
left: 0;
}
li {
width: 300px;
height: 100%;
float: left;
}
ol {
width: 150px;
height: 20px;
position: absolute;
bottom: 20px;
left: 50%;
transform: translateX(-50%);
border-radius: 15px;
display: flex;
justify-content: space-evenly;
align-items: center;
}
ol li {
width: 15px;
height: 15px;
background-color: ivory;
border-radius: 50%;
}
.active {
background-color: purple;
}
div {
position: absolute;
font-size: 20px;
height: 30px;
width: 100%;
top: 50%;
transform: translateY(-50%);
display: flex;
justify-content: space-between;
align-items: center;
}
div a {
background-color: rgba(0, 0, 0, 0.2);
width: 30px;
}
div a:active {
background-color: rgba(0, 0, 0, 0.5);
}
</style>
</head>
<body>
<!-- 布局 -->
<section>
<ul>
<li style="background-color:aqua;">1</li>
<li style="background-color: burlywood;">2</li>
<li style="background-color: coral;">3</li>
</ul>
<ol></ol>
<div>
<a href="javascript:;" rel="external nofollow" rel="external nofollow" ><</a>
<a href="javascript:;" rel="external nofollow" rel="external nofollow" >></a>
</div>
</section>
<script>
</script>
<script>
//自动播放函数,每隔两秒切换一次图片
function autoplay() {
move_time = setInterval(() => {
index++
move(ul, 'left', -index * wrap_width, movend)
}, 2000)
}
//运动函数,设置图片切换方式
//参数ele,元素;type,元素属性;value,元素运动结束时属性值;cb(),元素运动结束函数
function move(ele, type, value, cb) {
//获取元素属性初始值
let spe = parseInt(getComputedStyle(ele)[type])
//元素属性改变过程
change_timer = setInterval(() => {
value > spe ? spe += 10 : spe -= 10
ele.style[type] = spe + 'px'
if (value > spe) {
if (spe >= value) {
clearInterval(change_timer)
cb()
}
} else {
if (spe <= value) {
clearInterval(change_timer)
cb()
}
}
}, 10)
}
//运动结束函数
//判断索引临界值,更改索引,更改盒子位置,使图片轮播
//让焦点和图片配套
function movend() {
if (index >= ul.children.length - 1) {
index = 1
ul.style.left = -index * wrap_width + 'px'
}
if (index <= 0) {
index = ol.children.length
ul.style.left = -index * wrap_width + 'px'
}
for (let i = 0; i < ol.children.length; i++) {
ol.children[i].className = ''
}
ol.children[index - 1].className = 'active'
flag = false
}
//1、获取盛放图片的盒子和盛放焦点的盒子
let ul = document.querySelector('ul')
let ol = document.querySelector('ol')
//获取大盒子和大盒子的宽
let wrap = document.querySelector('section')
let wrap_width = wrap.clientWidth
//9、解决连续点击页面混乱问题
//添加开关,点击前关着,点击后图片未切换完成开着,图片切换完打开开关
let flag = false
//2、添加焦点
const frg = document.createDocumentFragment()
for (let i = 0; i < ul.children.length; i++) {
let focus = document.createElement('li')
frg.appendChild(focus)
//焦点初始化
if (i == 0) focus.className = 'active'
}
ol.appendChild(frg)
//3、复制元素,将复制元素放在指定位置
//改变盛放图片的盒子大小,改变图片位置,使页面打开时显示第一张图片
let first = ul.firstElementChild.cloneNode(true)
let last = ul.lastElementChild.cloneNode(true)
ul.appendChild(first)
ul.insertBefore(last, ul.firstElementChild)
ul.style.width = ul.children.length * 100 + '%'
ul.style.left = -wrap_width + 'px'
//4、图片自动轮播
//设置一个图片索引
let index = 1
//一会儿会用到这段代码,就直接封装成函数了
autoplay()
//5、鼠标移入停播,移出开始播放
wrap.onmouseover = () => clearInterval(move_time)
wrap.onmouseout = () => autoplay()
//6、点击左右按钮切换图片
//获取左右按钮
let left = document.querySelector('div').firstElementChild
let right = document.querySelector('div').lastElementChild
//点击左按钮,索引减少,图片切到上一张
left.onclick = function() {
if (flag) return
index--
move(ul, 'left', -index * wrap_width, movend)
flag = true
}
//点击右按钮,索引增加,图片切到下一张
right.onclick = function() {
if (flag) return
index++
move(ul, 'left', -index * wrap_width, movend)
flag = true
}
//7、点击焦点切换图片
for (let i = 0; i < ol.children.length; i++) {
//获取焦点索引
ol.children[i].id = i
//点击焦点切换图片
ol.children[i].onclick = function() {
if (flag) return
index = this.id - 0 + 1
move(ul, 'left', -index * wrap_width, movend)
flag = true
}
}
//8、解决切屏后页面混乱问题
document.onvisibilitychange = () => document.visibilityState == 'hidden' ? clearInterval(move_time) : autoplay()
</script>
</body>
</html>以上就是本文的全部内容,希望能为读者在学习JavaScript轮播图开发时提供帮助,欢迎大家继续支持本站。
JavaScript闭包与类(Class)的区别及适用场景对比
2026-11-05 15:48:57
JavaScript入门要学ES6吗?let与箭头函数等新特性解析
2026-11-05 14:49:16
JavaScript 8种数据类型详解:基本类型与引用类型的区别
2026-11-05 14:25:15
怎么在JavaScript中使用async/await优化Ajax异步流程
2026-11-05 13:56:15
JavaScript replace回调函数实现动态正则替换逻辑
2026-11-05 13:52:13