

Vue3+ElementPlus封装图片空间门面组件详解
作者:组件花园时间:2026-10-31 15:51:23浏览:403
本文介绍如何在Vue3和ElementPlus环境下封装一个图片空间门面组件。通过定义PictureSpaceFacade组件,实现图片的上传、预览、删除及数组状态同步,并提供便捷的调用方式。文章包含组件源码解析及使用示例,帮助开发者快速集成图片管理功能。
什么是图片空间?
图片空间是指专门用于管理上传图片的区域。
其作用类似于用户管理系统,用于对需要上传的图片进行统一管控。
这样做有哪些好处?
将可能用到的图片统一上传至图片管理模块后,在其他需要展示图片的场景(例如商品详情页)中,可以直接调用图片空间组件,从已管理的图片库中进行选取。
尽管图片空间的界面样式可能各不相同,但它们的入口逻辑是一致的。因此,这里封装了一个图片空间门面组件以统一入口。
1. PictureSpaceFacade.vue 组件实现
<script setup>
const props=defineProps({
  // 图片数组或字符串(http://a.com/1.jpg,http://a.com/2.jpg 用逗号隔开)
  modelValue: {
    type: [Array,String,Object],
  },
  // 图片宽度
  pictureWidth: {
    type:String,
    default: '100px'
  },
  // 图片高度
  pictureHeight:{
    type:String,
    default: '100px'
  }
})

const emits=defineEmits(['update:modelValue'])

import {ref, watch} from "vue";

// 图片数组
const pictureList = ref([])

// 监听props.modelValue变化
watch(() => props.modelValue, (newValue) => {
  if (newValue){
    pictureList.value=Array.isArray(newValue) ? newValue : props.modelValue.split(",");
  }else{
    pictureList.value = []
  }
},{deep:true,immediate:true})

// 预览图片开关
const previewVisible = ref(false)
// 预览图片url
const previewImageUrl = ref('')
// 点击预览图片按钮回调
function previewPicture(url) {
  previewVisible.value = true
  previewImageUrl.value = url
}
// 点击删除图片按钮回调
function deletePicture(url) {
  pictureList.value = pictureList.value.filter(item => url !== item)
  emits('update:modelValue', pictureList.value)
}

</script>
<template>
  <div id="app">
    <div class="container">
      <div class="container-item" :style="{width:pictureWidth ,height:pictureHeight}" v-for="item in pictureList" :key="item">
        <img class="img-item" :src="item" alt=""/>
        <div class="overlay">
          <span class="opt" @click="previewPicture(item)">预览</span>
          <span class="opt" @click="deletePicture(item)">删除</span>
        </div>
      </div>
      <div class="container-item add-container" :style="{width:pictureWidth ,height:pictureHeight}">
        <slot>+</slot>
      </div>
    </div>

    <!--    图片预览-->
    <el-dialog v-model="previewVisible" style="overflow: auto">
      <div style="height: 100%; width: 100%; display: flex; justify-content: center; align-items: center;">
        <img style="object-fit: cover; height: 100%; width: 100%;" :src="previewImageUrl" alt="Preview Image"/>
      </div>
    </el-dialog>

  </div>
</template>
<style scoped lang="scss">
.container {
display: flex;
flex-wrap: wrap;
width: 100%;
}
.container-item {
height: 150px;
width: 150px;
margin: 3px;
border: 1px solid #cecaca;
border-radius: 5px;
overflow: hidden;
position: relative;
&:hover .overlay {
opacity: 1;
}
.img-item {
height: 100%;
width: 100%;
}
.overlay {
position: absolute;
top: 0;
left: 0;
width: 100%;
height: 100%;
background-color: rgba(0, 0, 0, 0.5);
display: flex;
justify-content: center;
align-items: center;
color: #fff;
font-size: 14px;
opacity: 0;
transition: opacity .5s;
.opt {
cursor: pointer;
margin: 8px;
}
}
}
.add-container {
border: 1px dashed #cecaca;
cursor: pointer;
display: flex;
justify-content: center;
align-items: center;
&:hover {
border: 1px dashed blue;
}
}
</style>2. PictureSpaceFacade 组件的使用方式
<script setup>
import {ref} from "vue";
import PictureSpaceFacade from "./components/PictureSpaceFacade.vue";

// 获取随机图片
async function getPicture() {
  const response = await fetch('https://dog.ceo/api/breeds/image/random')
  const res = await response.json()
  return res.message
}

// 图片数组
const pictureList = ref([])
// 初始化图片数组(准备测试数据)
async function initPicture() {
  for (let i = 0; i < 3; i++) {
    pictureList.value.push(await getPicture())
  }
}

// 图片空间开关
const pictureSpaceVisible = ref(false)

// 打开图片空间
function openPictureSpace() {
  pictureSpaceVisible.value = true
}

// 关闭图片空间(从图片空间选择图片后对 pictureList进行填充)
async function closePictureSpace() {
  for (let i = 0; i < 2; i++) {
    pictureList.value.push(await getPicture())
  }
  pictureSpaceVisible.value = false
}

initPicture()
</script>
<template>
<el-row>
<el-col :span="8">
<PictureSpaceFacade v-model="pictureList" width="220px" picture-width="100px" picture-height="100px">
<div style="height: 100%;width: 100%;display: flex;justify-content: center;align-items: center;"
@click="openPictureSpace">+
</div>
</PictureSpaceFacade>
</el-col>
</el-row>
<!-- 图片空间弹出框-->
<el-dialog v-model="pictureSpaceVisible" title="图片空间" @close="closePictureSpace">
</el-dialog>
</template>
<style scoped lang="scss">
</style>
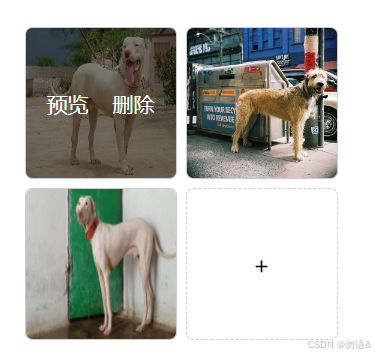
图片的宽度和高度由图片自身的尺寸决定。
当鼠标悬浮在图片上时,会显示操作按钮(此处的文字可自行替换为图标)。
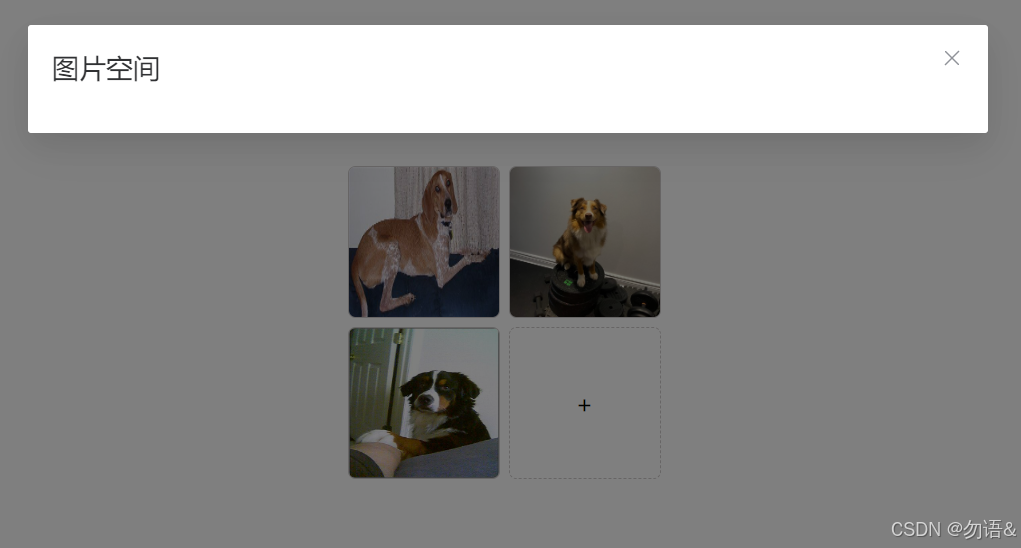
点击图片添加框,将弹出图片空间组件供用户进行选择。
通过选项绑定,将 pictureList 存入图片空间,从而在图片空间中能够对图片数组进行修改。
总结
以上为个人经验分享,希望能为大家提供参考,也希望大家多多支持本站。
作者最新文章
electron-builder打包与发布Electron应用
2026-11-01 05:18:32
Vue结合el-table实现表格行拖拽排序(基于sortablejs)
2026-11-01 01:30:37
详解如何在Vue中进行表单自定义验证
2026-11-01 01:17:28
UniApp 项目中 vue.config.js 配置指南
2026-11-01 00:21:50
uni-app全局变量的四种实现方式总结
2026-11-01 00:15:49