

Vue2 项目迁移至 Vite 实战:解决兼容性与 SVG 图标配置
本文详解如何将 Vue2 项目迁移至 Vite 构建工具。通过安装 vite-plugin-vue2 解决版本兼容问题,修正挂载方式与模板编译器缺失错误,并重新配置开发服务器代理以解决跨域。此外,还介绍了 vite-plugin-svg-icons 的使用及 SvgIcon 组件的全局注册方法,帮助开发者平滑过渡并优化开发体验。
背景
Vite 是伴随 Vue3 推出的构建工具,显著提升了开发效率。其核心优势在于省略了开发环境下的打包步骤,直接将 ES 模块源码传输给浏览器,利用浏览器原生的 <script module> 功能进行解析支持。
然而,Vite 主要面向 Vue3 生态设计。对于仍在使用 Vue2 的老项目,直接迁移至 Vite 需要解决兼容性问题,具体操作路径如下。
过程
首先,通过 vite 命令创建一个新的 Vue 项目。
npm init @vitejs/app在初始化过程中,选择 Vue 模板(Vite 同时也支持 React、Vanilla、Svelte、Preact 等其他框架模板)。
接着,将老项目中依赖的 npm 包安装到新项目中。
特别注意:必须同时安装老项目所使用的 Vue2 版本,例如本文示例中使用的 vue2.5.2 版本。
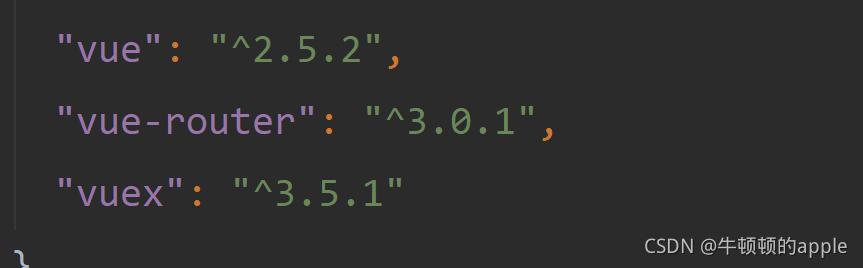
将老项目的 src 目录文件复制到新生成的 Vite 项目中,并尝试运行。
此时运行通常会报错,原因是 vite.config.js 中默认配置的插件仅支持 Vue3 及以上版本,因此需要引入支持 Vue2 的专用插件。
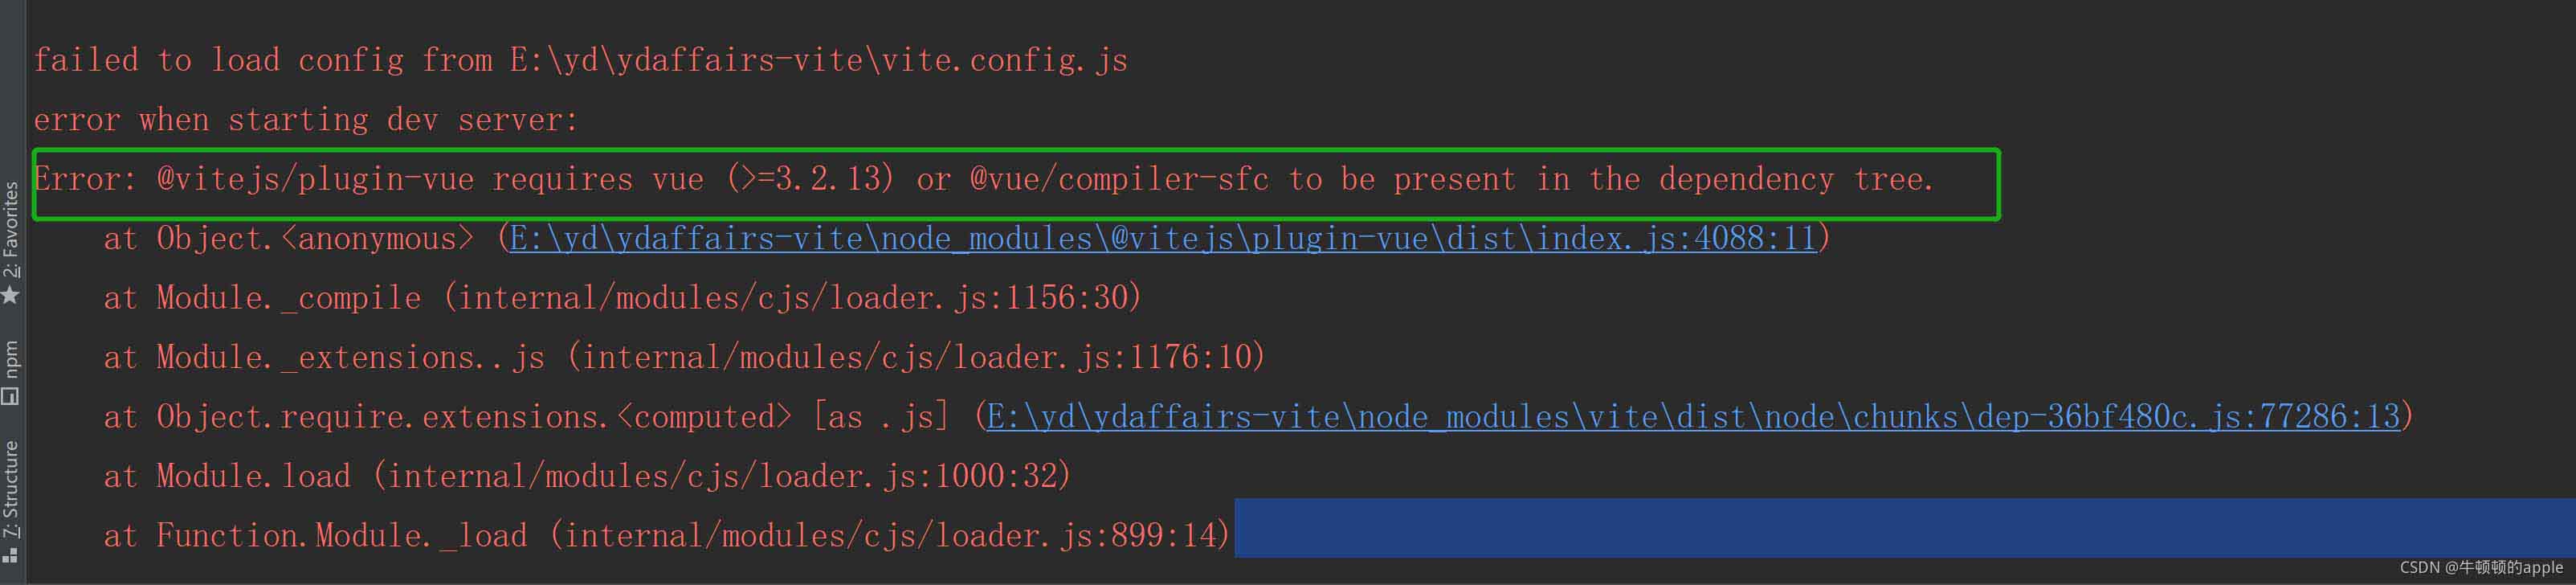
安装支持 Vue2 的插件,并相应修改 vite.config.js 配置文件。
npm install vite-plugin-vue2 -D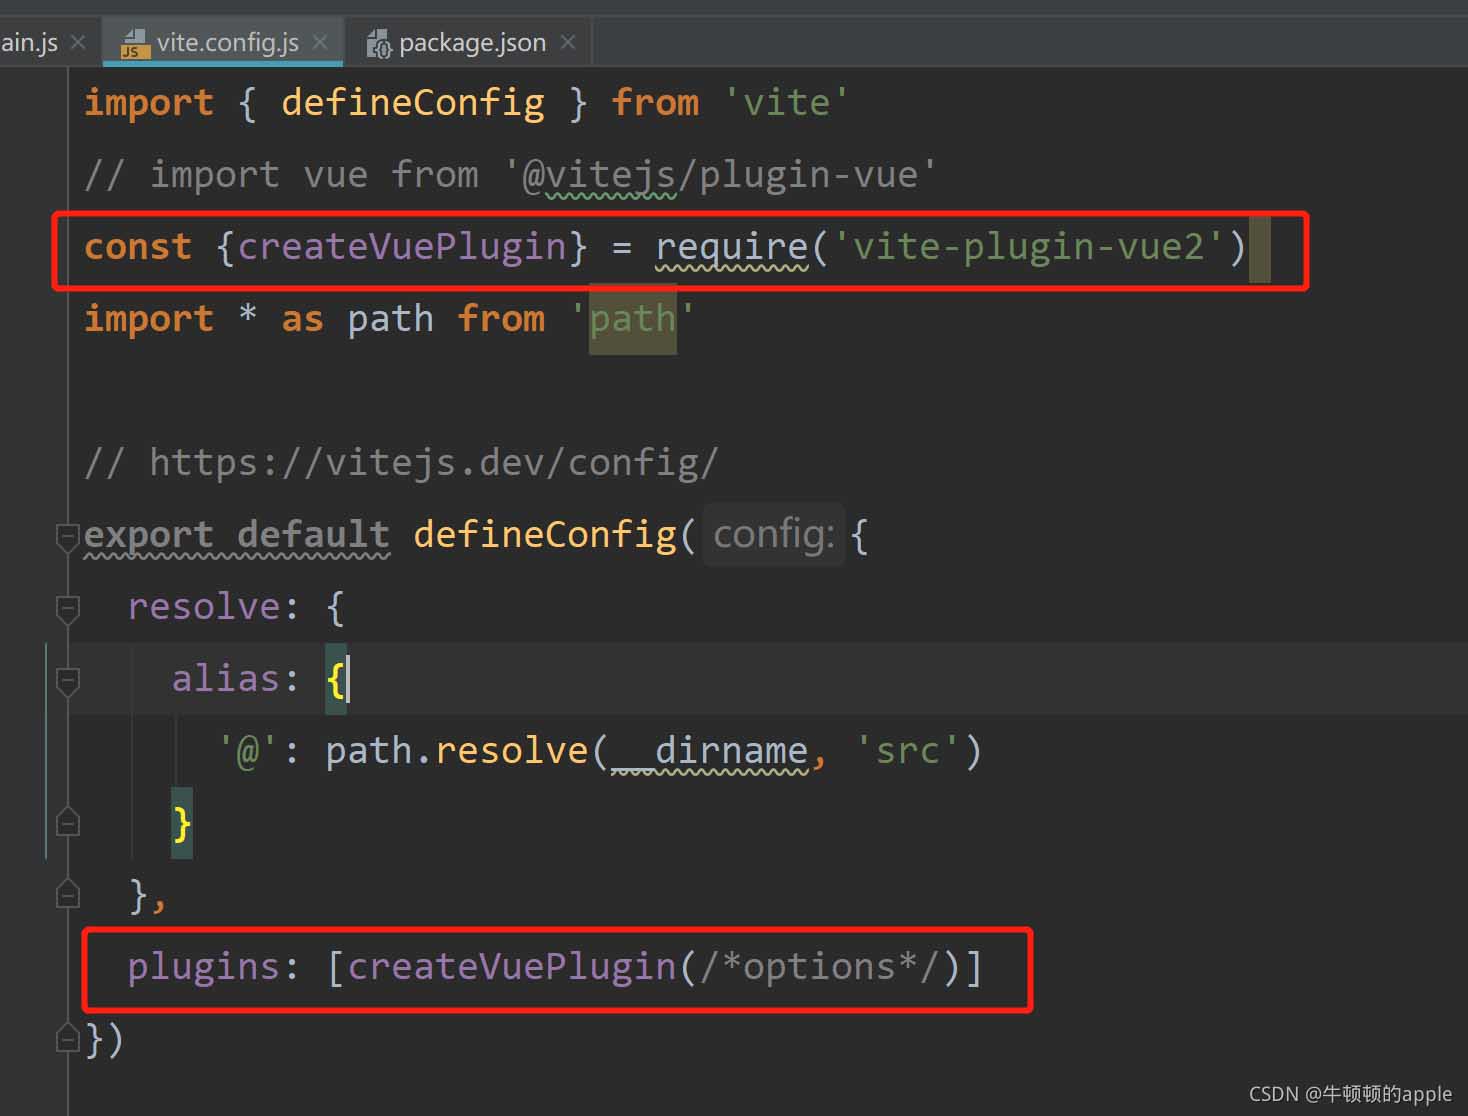
再次运行项目后,可能会遇到新的报错(有报错说明仍有修复空间,若无报错反而可能意味着配置遗漏)。
根据报错信息定位问题,提示找不到 vue-template-compiler 模块,此时需手动安装该模块即可解决。
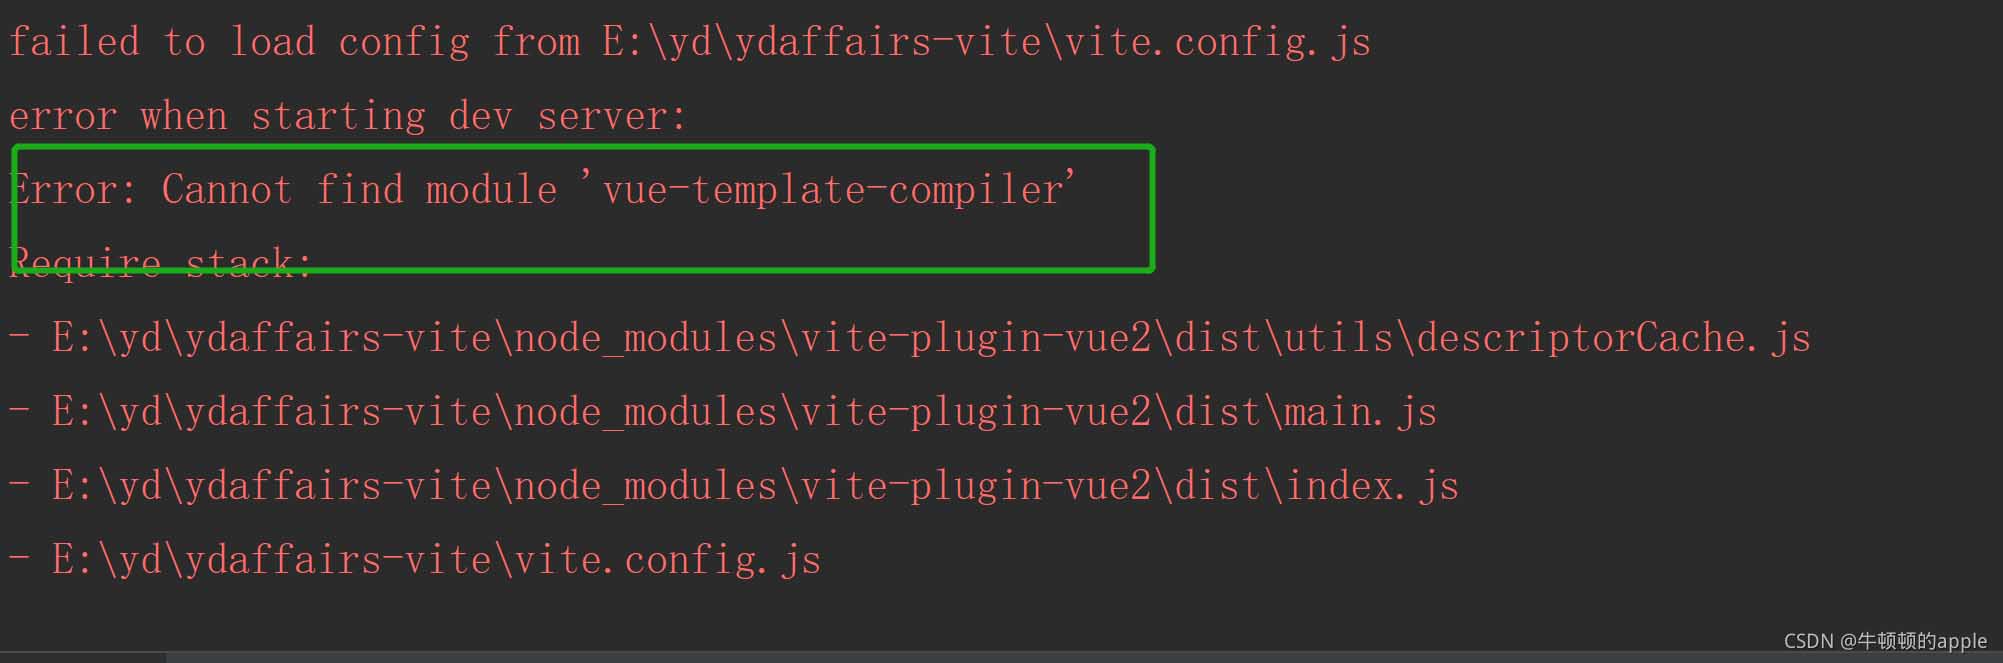
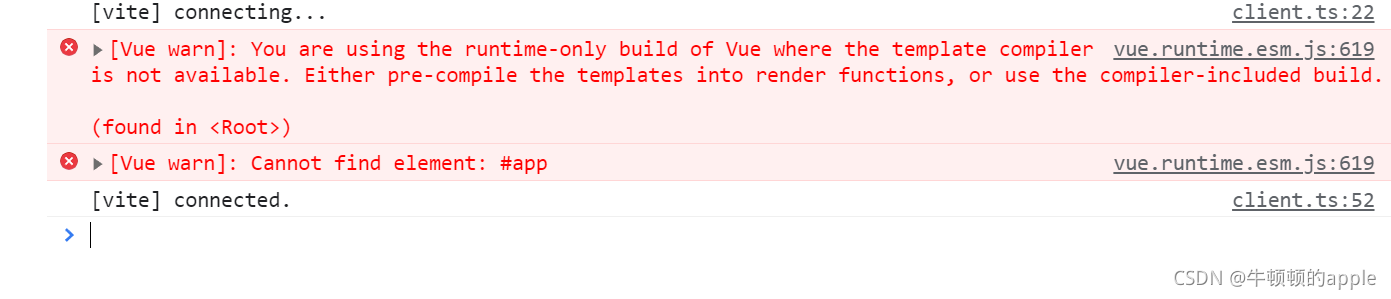
npm install vue-template-compiler -D安装完成后再次运行,页面可能仍未渲染,打开控制台查看发现新的错误。
错误原因通常是无法找到 #app 挂载点。Vue2 中传统的 DOM 元素挂载方式在 Vite 环境中未生效,因此需要修改 main.js 中根元素的挂载逻辑。
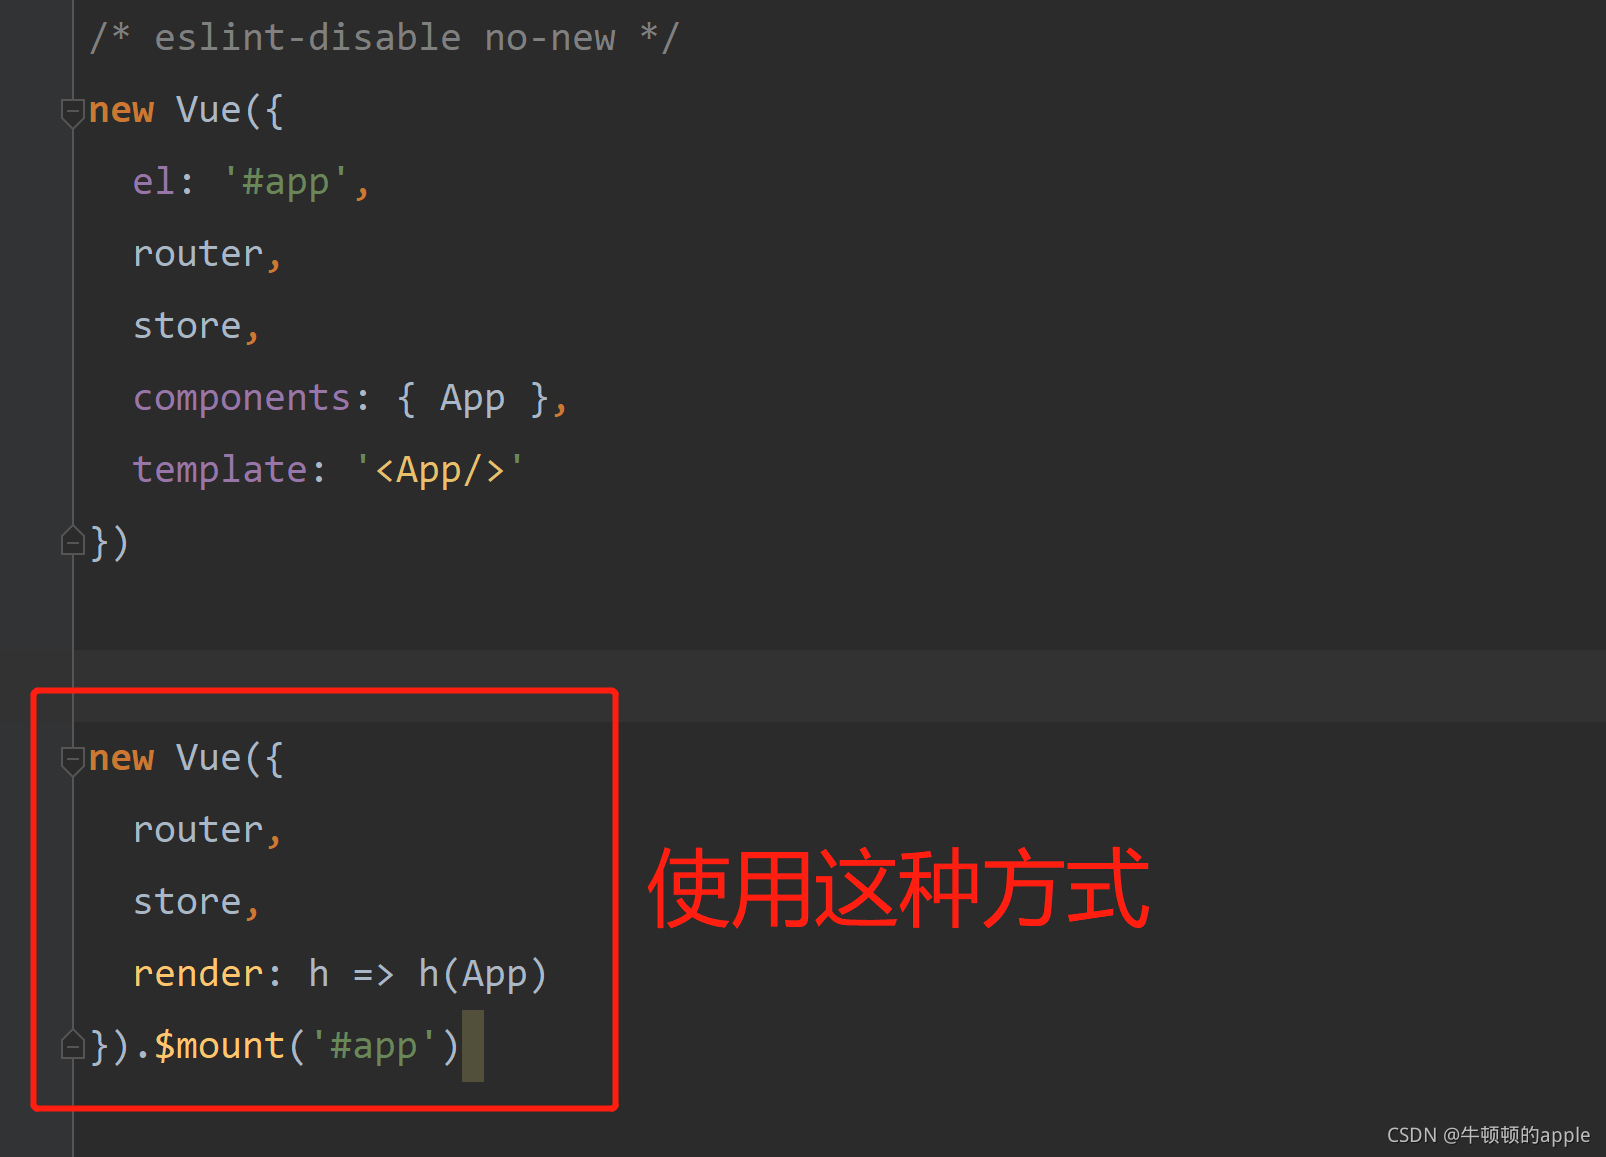
项目运行后,若发现接口请求报错(如出现跨域错误或 404),这是因为 Vue CLI 的代理配置与 Vite 的代理机制存在差异,需按照 Vite 规范重新配置代理。
server: {
		port: 8081, // 自己本地需要运行的端口
		fs: { // 不对根目录访问做限制
			strict: false,
		},
		proxy: {
			'/Index': { // 不要写成根路径!!!否则会直接跳转到线上地址
				target: 'http://www.需要代理的地址/',
				changeOrigin: true,
				rewrite: (path) => path.replace(/^\//, '') // 不要写成rewrite: (path) => path.replace(/^\/Index/, '')!!!否则会报404
			},
			'/Home': { // 不要写成根路径!!!否则会直接跳转到线上地址
				target: 'http://www.需要代理的地址/',
				changeOrigin: true,
				rewrite: (path) => path.replace(/^\//, '')
			},
		}
	},
完成上述调整后再次运行,项目即可成功启动。
========= vite 增加svg插件使用 =========
vite中使用svg图
1.安装插件
npm i vite-plugin-svg-icons -D2.配置vite.config.js文件, 并在src下新建文件夹icons,放入要使用的 .svg图片,如下:
// 引入
import viteSvgIcons from 'vite-plugin-svg-icons'

// 插件配置
plugins: [
	viteSvgIcons({
		iconDirs: [path.resolve(process.cwd(), 'src/icons')], // 在src下新建文件夹icons
		symbolId: 'icon-[dir]-[name]'
	})
],

注意:
如果使用 import viteSvgIcons from 'vite-plugin-svg-icons’报错,则需要换成这种写法
import { createSvgIconsPlugin } from ‘vite-plugin-svg-icons' createSvgIconsPlugin({
iconDirs: [path.resolve(process.cwd(), 'src/icons')], // 在src下新建文件夹icons
symbolId: 'icon-[dir]-[name]'
})
3. components下新建SvgIcon.vue文件,增加内容
<template>
	<svg aria-hidden="true">
		<use :href="symbolId" rel="external nofollow"  rel="external nofollow"  :fill="color" />
	</svg>
</template>

<script>
	export default {
		name: 'SvgIcon',
		props: {
			prefix: {
				type: String,
				default: 'icon',
			},
			name: {
				type: String,
				required: true,
			},
			color: {
				type: String,
				default: '#333',
			},
		},
		data() {
			return {
				symbolId: ''
			}
		},
		mounted() {
			this.symbolId = `#${this.prefix}-${this.name}`
		},
	}
</script>

<style scoped>
	svg { // 根据开发需求设置css
		width: 20px;
		height: 20px;
	}
</style>
注意⚠️:vue3中SvgIcon组件代码这么写
<template>
  <svg aria-hidden="true" class="svg-icon" :width="props.size" :height="props.size">
    <use :xlink:href="symbolId" rel="external nofollow"  rel="external nofollow"   :fill="props.color" />
  </svg>
</template>

<script setup>
import { computed } from 'vue'
const props = defineProps({
  prefix: {
    type: String,
    default: 'icon'
  },
  name: {
    type: String,
    required: true
  },
  color: {
    type: String,
    default: '#ffffff'
  },
  size: {
    type: String,
    default: '1rem'
  }
})
const symbolId = computed(() => `#${props.prefix}-${props.name}`)
</script>

<style scoped>
svg {
  width: 16px;
  height: 16px;
}
</style>
4.main.js中引入
import 'virtual:svg-icons-register'5.全局注册svg
// main.ts中引入

import SvgIcon from './components/SvgIcon.vue'

createApp(App)
.use(router)
.component('svg-icon', SvgIcon)
.mount('#app')
6.组件中使用svg
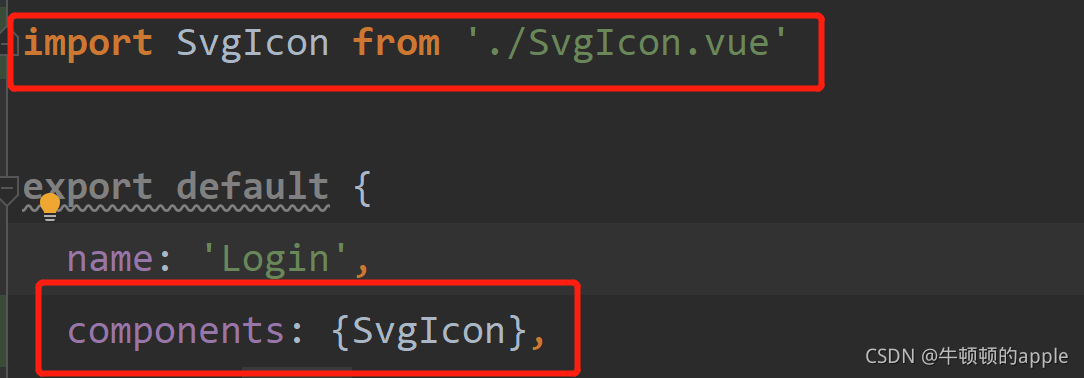
template使用

效果图,正常显示。

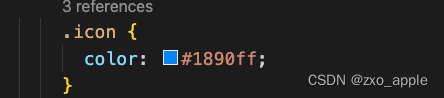
如果要修改svg颜色,修改icons下 如account.svg中的fill字段为currentColor

页面中设置样式的color即可
总结
以上为个人经验,希望能给大家一个参考,也希望大家多多支持本站。
Vue项目中怎么集成JS颜色选择器组件
2026-11-05 13:28:32
Nuxt 3 快速上手:项目初始化与目录结构详解
2026-11-03 19:16:51
怎么在 Vue 或 React 项目中正确集成 viewer.js
2026-11-02 09:17:48
Vue3+Vue-Router+Vite实现动态路由的完整流程与代码示例
2026-11-01 03:30:58
el-tree限制选中个数的实例
2026-11-01 03:09:07