

Vue 3 遮罩组件实现:Ref调用子组件方法(Setup与非Setup对比)
本文详细介绍在 Vue 3 中实现遮罩弹窗组件的方法,重点演示如何通过父组件使用 ref 调用子组件暴露的方法。文章对比了 Setup 语法与非 Setup 语法的实现差异,特别强调了在 Setup 模式下必须返回 ref 实例的关键注意事项,帮助开发者避免常见错误。
遮罩组件与父组件代码实现
首先,创建名为 conform.vue 的组件文件,其具体代码如下:
<template>
  <div v-if="fade">
    <div class="xtx-confirm" :class="{fade}">
      <div class="wrapper" :class="{fade}">
        <div class="header">
          <h3>{{title}}</h3>
          <a @click="cancel" href="JavaScript:;" rel="external nofollow"  >x</a>
        </div>
        <div class="body">
          <i class="iconfont icon-warning"></i>
          <span>{{text}}</span>
        </div>
        <div class="footer">
          <span @click="cancel" class="cancel">取消</span>
          <span @click="submit" class="submit">确认</span>
        </div>
      </div>
    </div>
  </div>
</template>
<script >
import { onMounted, ref,  } from 'vue'
export default {
  name: 'conform',
  props:{
    title: {
      type: String,
      default: '温馨提示'
    },
    text: {
      type: String,
      default: ''
    },
  },
  setup(){
    const fade = ref(false)
    const open = () => {
      fade.value = true
    }
// 取消
    const cancel = () => {
      fade.value = false
    }
// 确认
    const submit = () => {
      fade.value = false
    }
    return { fade, open, cancel, submit}
  }
}
</script>
<style scoped lang="less">
.xtx-confirm {
  position: fixed;
  left: 0;
  top: 0;
  width: 100%;
  height: 100%;
  z-index: 8888;
  background: rgba(0,0,0,0);
  &.fade {
    transition: all 0.4s;
    background: rgba(0,0,0,.5);
  }
  .wrapper {
    width: 400px;
    background: #fff;
    border-radius: 4px;
    position: absolute;
    top: 50%;
    left: 50%;
    transform: translate(-50%,-60%);
    opacity: 0;
    &.fade {
      transition: all 0.4s;
      transform: translate(-50%,-50%);
      opacity: 1;
    }
    .header,.footer {
      height: 50px;
      line-height: 50px;
      padding: 0 20px;
    }
    .body {
      padding: 20px 40px;
      font-size: 16px;
      .icon-warning {
        color: red;
        margin-right: 3px;
        font-size: 16px;
      }
    }
    .footer {
      text-align: right;
      cursor: pointer;
      .cancel{
        margin-right: 20px;
        cursor: pointer;
      }
      .submit{
        cursor: pointer;
      }
    }
    .header {
      position: relative;
      h3 {
        font-weight: normal;
        font-size: 18px;
      }
      a {
        position: absolute;
        right: 15px;
        top: 15px;
        font-size: 20px;
        width: 20px;
        height: 20px;
        line-height: 20px;
        text-align: center;
        color: #999;
        &:hover {
          color: #666;
        }
      }
    }
  }
}
</style>
接着,在 App.vue 中编写父组件代码,具体实现如下:
<!--方式1-->
<template>
  <button  @click="show_open">打开弹窗</button>
  <conform ref="conform_ref"></conform>
</template>

<script >
import conform from "@/components/conform.vue";
import {ref} from "vue";
export default {
  name: 'App',
  components:{ conform},
  setup(){
    const conform_ref = ref(null)
    const show_open = ()=>{
      conform_ref.value.open()
    }
    // 特别要注意这种方式,虽然conform_ref没在
    // template中使用但是一定要返回,否则会出问题
    return{conform_ref, show_open}
  }
}

</script>


<!--方式二-->
<!--<template>-->
<!--  <button  @click="validate_ref">主要按钮</button>-->
<!--  <conform ref="validate" ></conform>-->

<!--</template>-->

<!--<script setup>-->
<!--import conform from './components/conform.vue'-->
<!--import {ref} from "vue";-->

<!--const validate = ref(null)-->
<!--const validate_ref = ()=>{-->
<!--  validate.value.open()-->
<!--  console.log(validate.value)-->
<!--}-->

<!--</script>-->
<!--<style scoped lang="less">-->
<!--</style>-->
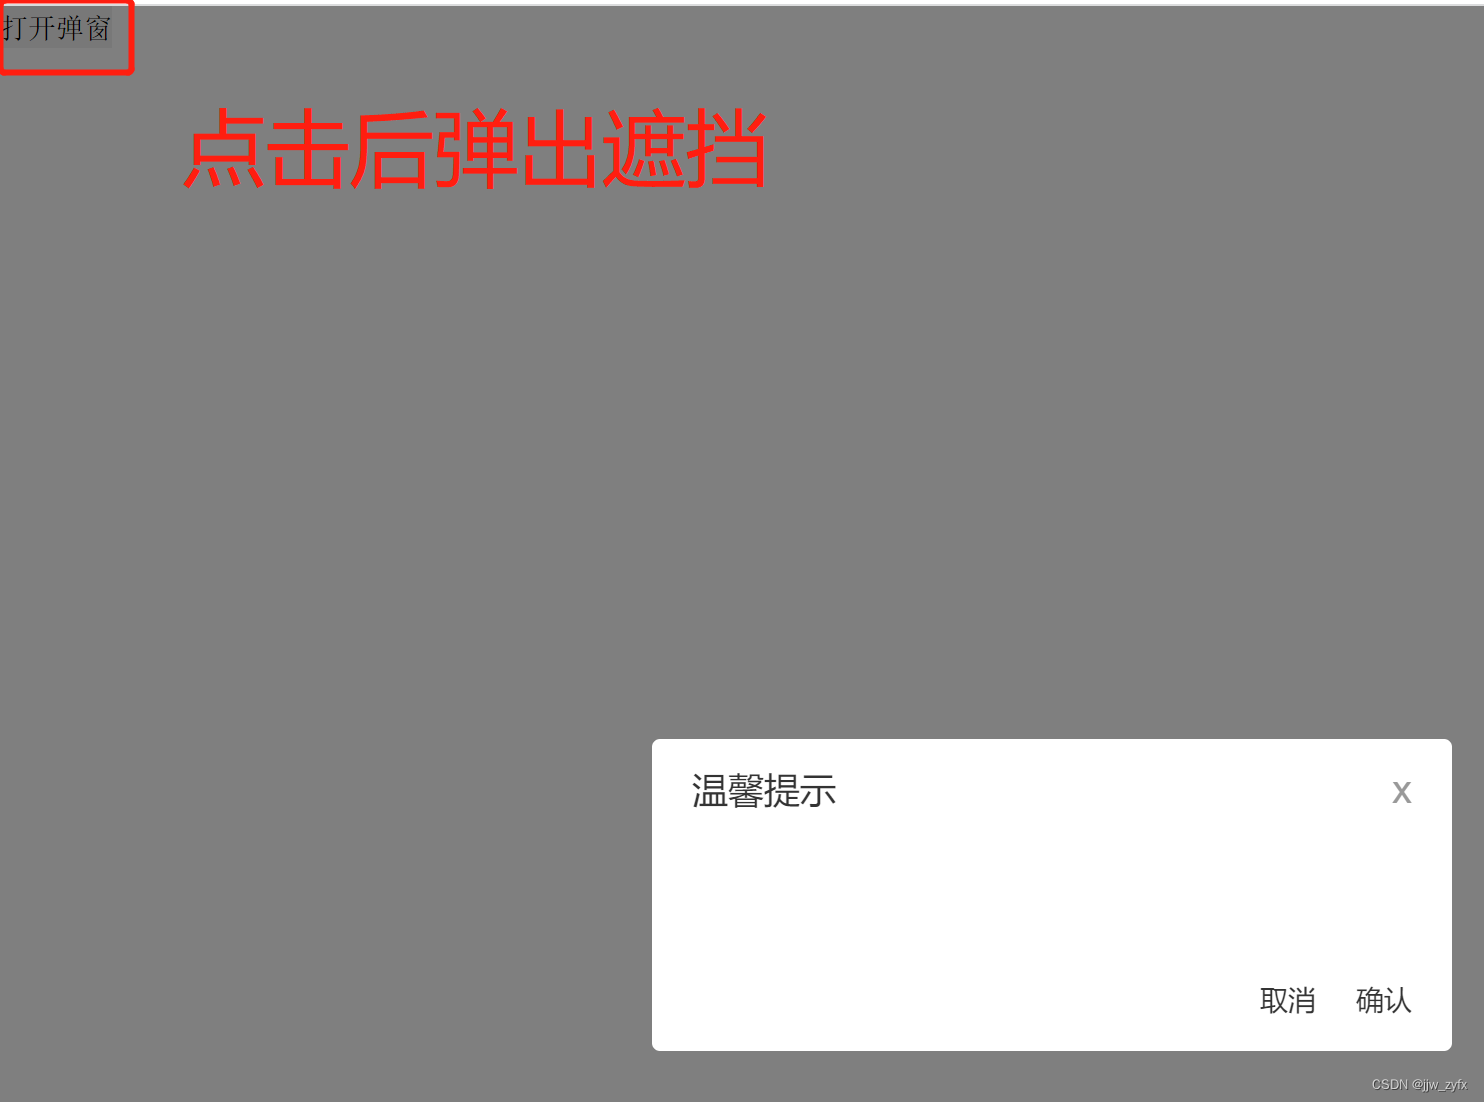
运行后的界面效果如下图所示:
Setup模式下Ref返回的关键注意事项
需要特别注意的是方式一的实现逻辑。即使 conform_ref 变量未在 template 模板中直接引用,也必须在 setup 函数的返回值中显式返回该 ref 实例,否则会导致调用失败或出现其他异常问题。
相关Vue 3技术参考链接
关于其他 ref 用法的详细说明,请参考以下链接:
Vue 3 Setup 模式下父组件通过 Ref 调用子组件方法的实例代码
Vue 3 中如何使用 ref 和 reactive 定义及修改响应式数据(最新推荐方案)
至此,关于 Vue 遮罩组件及 ref 在 Setup 版与非 Setup 版中的使用方法已介绍完毕。如需了解更多相关内容,建议搜索本站往期文章或继续阅读后续系列教程,感谢大家的支持!
前端大屏自适应方案:缩放与视口单位对比
2026-10-31 18:19:27
前端大文件分片下载实现:基于localForage与Vue的完整方案
2026-10-31 16:11:47
Vue3 中使用 VueUse 实现指定区域全屏阅读功能
2026-10-31 13:55:05
基于Vue与Pinia实现页面Loading动画及请求拦截处理
2026-10-31 13:54:42
Vue封装Echarts通用组件:Vue2/Vue3 JS/TS三种模板及常用配置事件详解
2026-10-31 11:38:03