

JS前端使用Canvas快速实现手势解锁特效
本文详细介绍如何在JS前端利用Canvas快速实现手势解锁特效。通过计算星星坐标、监听触摸事件及绘制连线,实现类似手机屏幕解锁的交互。文章涵盖初始化布局、处理多点连接逻辑、限制星星数量以及解决页面滚动冲突等关键细节,并提供兼容PC与移动端的完整代码思路。
前言
此前在公司开发活动项目时,遇到一个需求:让用户通过绘制星位图来解锁星座运势。查看设计稿后发现,这实际上就是常见的手机屏幕解锁手势。由于网上未找到可直接复用的代码,作者便查阅Canvas教程,边学边做,最终实现了该功能,并兼容了移动端和PC端。现将实现过程与代码分享如下,供感兴趣者参考。
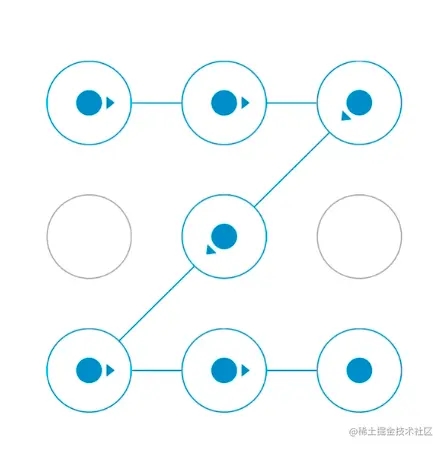
Demo
如需查看完整源码,请访问作者的GitHub仓库。
需要实现的功能
- 在Canvas画布中展示指定行数乘以列数的星星,并支持随机分布位置。
- 支持手指在屏幕上滑动,连接画布上任意亮起的星星节点。
- 当画布上已存在连接的星星序列时,允许从已有序列的首部或尾部继续延伸连接。
- 同一颗星星不可重复连接,且必须限制连接星星数量的最大值与最小值。
- 其他要求:需兼容PC端操作,且在连接星星的过程中禁止页面滚动。
初始化数据和页面渲染
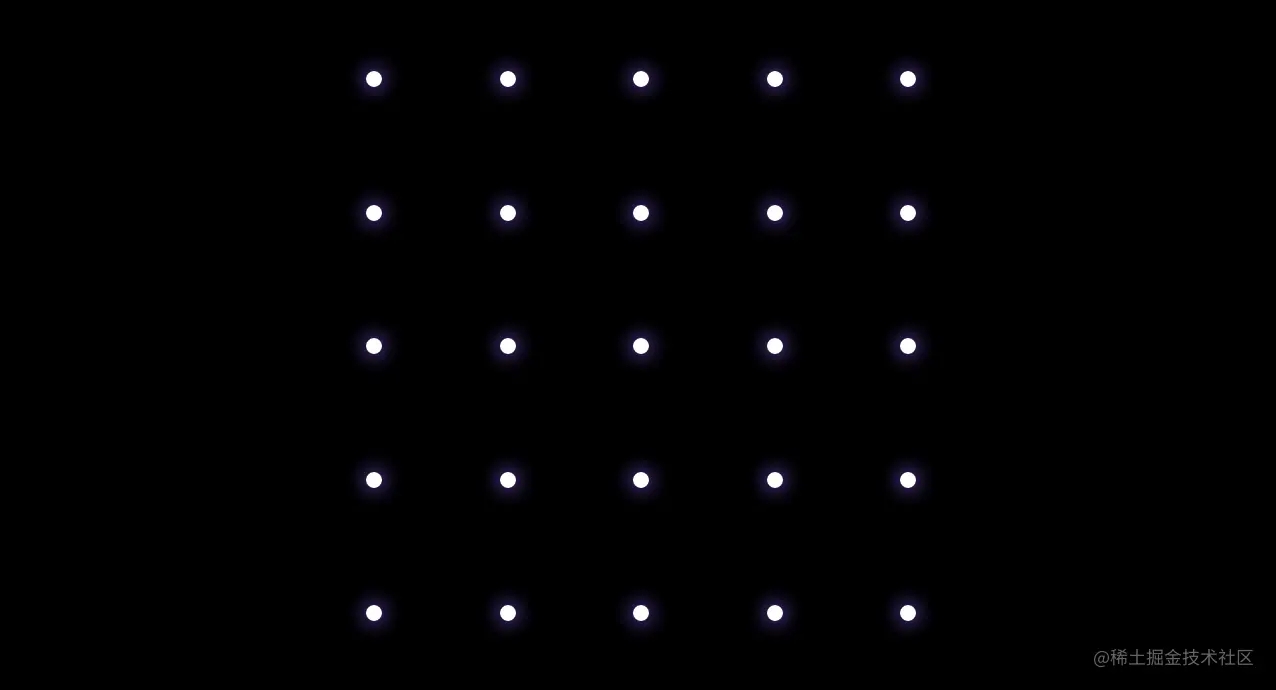
- 首先定义连接星星的行列数量(starXNum 和 starYNum),以及Canvas画布的宽高尺寸。
- 根据设定的行列数和画布大小,计算每颗星星的尺寸(starX)以及横向和纵向的间距(spaceX、spaceY)。在初始化星星时,起初尝试直接用Canvas渲染小圆点,但因边缘锯齿明显、视觉体验不佳,最终改为使用常规div配合CSS绘制所有星星,并通过计算距离进行渲染(如上图所示)。
<div class="starMap" ref="starMap">
  <canvas
      id="starMap"
      ref="canvas"
      class="canvasBox"
      :width="width"
      :height="height"
      :style="{ width, height }"
      @touchstart="touchStart"
      @touchmove="touchMove"
      @touchend="touchEnd"
      @mousedown="touchStart"
      @mousemove="touchMove"
      @mouseup="touchEnd"
      @mouseout="touchEnd"
      @mouseenter="touchStart"
  ></canvas>
  <div class="starsList">
    <div v-for="n in starXNum" :key="n" class="starColBox" :style="{ marginBottom: `${spaceY}px` }">
      <div v-for="j in starYNum" :key="j" class="starRow" :style="{ marginRight: `${spaceX}px` }">
        <div :class="['starIcon', showStar(n, j) && 'show']" :style="{ width: `${starX}px`, height: `${starX}px` }">
          <div :class="['starCenter', isSelectedStar(n, j) && `animate-${getRandom(0, 2, 0)}`]"></div>
        </div>
      </div>
    </div>
  </div>
  <canvas id="judgeCanvas" :width="width" :height="height" class="judgeCanvas" :style="{ width, height }"></canvas>
</div>
/*
 * this.width=画布宽
 * this.height=画布高
 * this.starX=星星的大小,宽高相等不做区分
*/
spaceX () { // 星星横向间距
  return (this.width - this.starX * this.starXNum) / 4
}
spaceY () { // 星星纵向间距
  return (this.height - this.starX * this.starYNum) / 4
}
初始化canvas画布和基础数据
- 通过调用 canvas.getContext('2d') 获取绘图上下文区域。
- 定义一个数组 pointIndexArr 存储画布上所有可能的星星索引,再定义数组 pointPos 存储当前展示的所有星星坐标(以Canvas画布左上角为原点),用于在手指滑动过程中判断是否经过某个点。
- 定义数组 points 用于存放画布上已经成功连接的星星坐标。
- 设置Canvas绘图样式,包括连接线宽度 lineWidth、模糊度 lineBlurWidth,设置连接线颜色 strokeStyle = '#c9b8ff',并将连接线末端样式设置为圆形线帽 lineCap = 'round'。
function setData () { // 初始化canvas数据
  this.initStarPos()
  this.lineWidth = 2 // 连接线宽度
  this.lineBlurWidth = 6 // 连接线shadow宽
  this.canvas = document.getElementById('starMap')
  if (!this.canvas) return console.error('starMap: this.canvas is null')
  this.ctx = this.canvas.getContext('2d')
  this.ctx.strokeStyle = '#c9b8ff'
  this.ctx.lineCap = 'round'
  this.ctx.lineJoin = 'bevel'
  const judgeCanvas = document.getElementById('judgeCanvas')
  this.judgeCtx = judgeCanvas.getContext('2d')
}
function initStarPos () { // 初始化星星位置
  const arr = this.pointIndexArr = this.initPointShowArr()
  const pointPos = []
  /**
   * spaceX=横向间距;spaceY:纵向间距
   * 星星中点x位置: 星星/2 + (星星的尺寸 + 横向间距)* 前面的星星数量
   * 星星中点y位置: 星星/2 + (星星的尺寸 + 竖向间距)* 前面的星星数量
   * pointPos=所有页面渲染的星星(x, y)坐标
   */
  arr.forEach(item => {
    let x = 0
    let y = 0
    x = this.starX / 2 + (this.starX + this.spaceX) * (item % this.starXNum)
    y = this.starX / 2 + (this.starX + this.spaceY) * Math.floor(item / this.starXNum)
    pointPos.push({ x, y, index: item })
  })
  this.pointPos = [...pointPos]
}
function initPointShowArr () {
  const result = []
  const originArr = []
  const arrLen = getRandom(25, this.starXNum * this.starYNum, 0) // 可选择随机选择需要显示星星的数量 getRandom(21, 25, 0)
  const starOriginLen = this.starXNum * this.starYNum
  for (let i = 0; i < starOriginLen; i++) {
    originArr.push(i)
  }
  // 获取星星展示随机数组后进行排序重组
  for (let i = 0; i < arrLen; i++) {
    const random = Math.floor(Math.random() * originArr.length)
    if (result.includes(originArr[random])) {
      continue
    }
    result.push(originArr[random])
    originArr.splice(random, 1)
  }
  result.sort((a, b) => a - b)
  return result
}
touchstart 手指开始触摸事件
监听手指开始触摸事件:
- 判断手指触摸起始位置是否恰好落在某颗星星的坐标上。首先需通过 getBoundingClientRect 方法获取Canvas画布相对于视口的坐标 (x, y),将当前触摸点坐标减去该偏移量,即可得到手指在Canvas内的相对坐标。
- 调用 indexOfPoint 方法,将当前坐标与 pointPos 数组中的星星坐标进行匹配,判断是否需要进行Canvas画线操作。若匹配成功,则将该星星添加到已连接星星数组中。
- 由于限制了每次连接星星的最大数量,因此在每次开始连接点时,需调用 checkLimit() 校验是否超出最大限制。
- 使用变量 reconnectStart 来记录当前是否是在画布上已有星星序列的基础上进行续连。
function touchStart (e) {
  if (this.checkLimit()) return
  this.lockScroll()
  const rect = this.$refs.canvas.getBoundingClientRect() // 此处获取canvas位置,防止页面滚动时位置发生变化
  this.canvasRect = { x: rect.left, y: rect.top, left: rect.left, right: rect.right, bottom: rect.bottom, top: rect.top }
  const [x, y] = this.getEventPos(e)
  const index = this.indexOfPoint(x, y)
  if (this.pointsLen) {
    this.reconnectStart = true
  } else {
    this.pushToPoints(index)
  }
}
function getEventPos (event) { // 当前触摸坐标点相对canvas画布的位置
    const x = event.clientX || event.touches[0].clientX
    const y = event.clientY || event.touches[0].clientY
    return [x - this.canvasRect.x, y - this.canvasRect.y]
}
function indexOfPoint (x, y) {
  if (this.pointPos.length === 0) throw new Error('未找到星星坐标')
  // 为了减少计算量,将星星当初正方形计算
  for (let i = 0; i < this.pointPos.length; i++) {
    if ((Math.abs(x - this.pointPos[i].x) < this.starX / 1.5) && (Math.abs(y - this.pointPos[i].y) < this.starX / 1.5)) {
      return i
    }
  }
  return -1
}
function pushToPoints (index) {
  if (index === -1 || this.points.includes(index)) return false
  this.points.push(index)
  return true
}
function checkBeyondCanvas (e) { // 校验手指是否超出canvas区域
  const x = e.clientX || e.touches[0].clientX
  const y = e.clientY || e.touches[0].clientY
  const { left, top, right, bottom } = this.canvasRect
  const outDistance = 40 // 放宽边界的判断
  if (x < left - outDistance || x > right + outDistance || y < top - outDistance || y > bottom + outDistance) {
    this.connectEnd()
    return true
  }
  return false
}
touchmove 监听手指滑动事件
监听手指滑动事件:
- 在手指滑动过程中,实时获取每个点的坐标(x, y),判断该点是否恰好落在某颗星星的坐标范围内,随后调用 draw() 方法进行画线操作。
- a. 如果未移动到星星的位置,则在画布上绘制从上一颗连接星星到当前鼠标/手指点的轨迹。
- b. 如果移动到了某颗星星的坐标范围内,则在上一颗星星和当前星星之间绘制一条直线,并将该点添加到 points 数组中。
- 在 draw 方法中,每次画线前需调用 canvas.clearRect 清空画布,清除上一次的状态,然后重新调用 drawLine 方法,按照 points 数组中的点顺序绘制新的星星连线轨迹。
drawLine中涉及到一些canvas的基本方法和属性:
  canvas.beginPath() // 表示开始画线或重置当前路径
  canvas.moveTo(x, y) // 指定目标路径的开始位置,不创建线条
  canvas.lineTo(x, y) // 添加一个新点,创建从该点到画布中最后指定点的线条,不创建线条
  canvas.closePath() // 结束路径,应与开始路径呼应
  canvas.stroke() // 实际地绘制出通过 moveTo() 和 lineTo() 方法定义的路径,默认为黑色
  const grd = canvas.createLinearGradient(x1, y1, x2, y2) // 创建线性渐变的起止坐标
  grd.addColorStop(0, '#c9b8ff') // 定义从 0 到 1 的颜色渐变
  grd.addColorStop(1, '#aa4fff')
  canvas.strokeStyle = grd
function touchMove (e) {
  console.log('touchMove', e)
  if (this.checkBeyondCanvas(e)) return // 防止touchmove移出canvas区域后不松手,滚动后页面位置改变在canvas外其他位置触发连接
  if (this.checkLimit()) return
  this.lockScroll() // 手指活动过程中禁止页面滚动
  const [x, y] = this.getEventPos(e)
  const idx = this.indexOfPoint(x, y)
  if (this.reconnectStart && (idx === this.points[this.pointsLen - 1] || idx !== this.points[0])) {
    this.reconnectStart = false
    idx === this.points[0] && this.points.reverse()
  }
  this.pushToPoints(idx)
  this.draw(x, y)
}
function draw (x, y) {
  if (!this.canvas) return
  this.ctx.clearRect(0, 0, this.canvas.width, this.canvas.height)
  if (this.pointsLen === 0) return
  this.rearrangePoints(x, y)
  this.drawLine(x, y)
}
function drawLine (x, y) {
  this.ctx.lineWidth = this.lineWidth
  const startPos = this.getPointPos(0)
  const endPos = this.getPointPos(this.pointsLen - 1)
  for (let i = 1; i < this.pointsLen; i++) {
    const movePos = i === 1 ? startPos : this.getPointPos(i - 1)
    this.drawradientLine(movePos.x, movePos.y, this.getPointPos(i).x, this.getPointPos(i).y, true)
  }
  if (x !== undefined && y !== undefined) {
    this.drawradientLine(endPos.x, endPos.y, x, y, false)
  } else {
    this.ctx.stroke()
  }
}
drawradientLine (x1, y1, x2, y2, closePath) { // 渐变线条
  if (!this.ctx) return
  this.ctx.beginPath()
  this.ctx.moveTo(x1, y1) // 开始位置
  this.ctx.lineTo(x2, y2) // 画到此处
  const grd = this.ctx.createLinearGradient(x1, y1, x2, y2) // 线性渐变的起止坐标
  grd.addColorStop(0, '#c9b8ff')
  grd.addColorStop(1, '#aa4fff')
  this.ctx.strokeStyle = grd
  this.ctx.shadowBlur = this.lineBlurWidth
  this.ctx.shadowColor = '#5a00ff'
  closePath && this.ctx.closePath()
  this.ctx.stroke()
}
touchend 监听手指触摸结束事件
当手指离开屏幕时,若当前连接的星星少于两颗(至少需连接两个点),则清空数组;否则,根据当前已连接的点重新绘制线条。若已连接的点数小于最小限制,则向用户弹出toast提示。
至此,连接星星的基本功能已完成,但仍需进行一些细节处理以优化体验。
function touchEnd (e) {
  this.connectEnd(true)
}
connectEnd () {
  this.unlockScroll()
  if (this.pointsLen === 1) {
    this.points = []
  }
  this.draw()
  if (this.pointsLen > 1 && this.pointsLen < this.minLength && !this.reconnectStart) {
    this.showToast(`至少连接${this.minLength}颗星星哦~`)
  }
}
页面滚动处理
当页面存在滚动条时,连线过程中容易带动页面滚动,导致触摸点错位且用户体验不佳。解决方案为:每当手指触摸画布区域开始连接时,先禁止页面滚动;当手指放开或离开画布后,再恢复页面滚动。
具体代码如下:
function lockScroll () {
  if (this.unlock) return
  this.unlock = lockScrollFunc()
}
function unlockScroll () {
  if (this.unlock) {
    this.unlock()
    this.unlock = null
  }
}
function unLockScrollFunc () {
  const str = document.body.getAttribute(INTERNAL_LOCK_KEY)
  if (!str) return
  try {
    const { height, pos, top, left, right, scrollY } = JSON.parse(str)
    document.documentElement.style.height = height
    const bodyStyle = document.body.style
    bodyStyle.position = pos
    bodyStyle.top = top
    bodyStyle.left = left
    bodyStyle.right = right
    window.scrollTo(0, scrollY)
    setTimeout(() => {
      document.body.removeAttribute(LOCK_BODY_KEY)
      document.body.removeAttribute(INTERNAL_LOCK_KEY)
    }, 30)
  } catch (e) {}
}
function lockScrollFunc () {
  if (isLocked) return unLockScrollFunc
  const htmlStyle = document.documentElement.style
  const bodyStyle = document.body.style
  const scrollY = window.scrollY
  const height = htmlStyle.height
  const pos = bodyStyle.position
  const top = bodyStyle.top
  const left = bodyStyle.left
  const right = bodyStyle.right
  bodyStyle.position = 'fixed'
  bodyStyle.top = -scrollY + 'px'
  bodyStyle.left = '0'
  bodyStyle.right = '0'
  htmlStyle.height = '100%'
  document.body.setAttribute(LOCK_BODY_KEY, scrollY + '')
  document.body.setAttribute(INTERNAL_LOCK_KEY, JSON.stringify({
    height, pos, top, left, right, scrollY
  }))
  return unLockScrollFunc
}
连接的两颗星星之间有其他星星时
如上所示,当连接的两颗星星路径上存在其他星星时,视觉上虽连接了4颗星星,但中间两颗手指未直接触摸过的星星并未加入当前绘制星星的数组。这会导致最大最小星星数量限制失效。因此,需通过判断方向,将中间两颗星星也接入到已连接星星数组中,并在每次 draw() 时进行判断处理。
如下列出了连接所有可能的8种情况和处理步骤:
判断是否有多余的点
判断方向 a.竖线: x1 = x2
- 从上到下: y1 < y2
- 从下到上: y1 > y2 b.横线:y1 = y2
- 从左到右:x1 < x2
- 从右到左:x1 > x2 c.斜线()
- 从上到下:x1 < x2 y1 < y2
- 从下到上:x1 > x2 y1 > y2 d.斜线(/)
- 从上到下:x1 > x2 y1 < y2
- 从下到上:x1 < x2 y1 > y2
给点数组重新排序
与points合并
长度超出最大限制个则从末尾抛出
开始画线
canvas.isPointInPath(x, y) // 判断点 (x, y)是否在canvas路径的区域内
function rearrangePoints () { // 根据最后两个点之间连线,如果有多出的点进行重排,否则不处理
  if (this.pointsLen === 1) return
  const endPrevPos = this.getPointPos(this.pointsLen - 2)
  const endPos = this.getPointPos(this.pointsLen - 1)
  const x1 = endPrevPos.x
  const y1 = endPrevPos.y
  const x2 = endPos.x
  const y2 = endPos.y
  this.judgeCtx.beginPath()
  this.judgeCtx.moveTo(x1, y1) // 开始位置
  this.judgeCtx.lineTo(x2, y2) // 画到此处
  const extraArr = []
  const realArr = []
  this.pointPos.forEach((item, i) => {
    if (this.judgeCtx.isPointInStroke(item.x, item.y)) realArr.push(i)
    if (this.judgeCtx.isPointInStroke(item.x, item.y) && !this.points.includes(i)) {
      extraArr.push(i)
    }
  })
  if (!extraArr.length) return
  const extraPosArr = extraArr.map(item => {
    return { ...this.pointPos[item], i: item }
  })
  const getExtraSortMap = new Map([
    [[0, -1], (a, b) => a.y - b.y],
    [[0, 1], (a, b) => b.y - a.y],
    [[-1, 0], (a, b) => a.x - b.x],
    [[1, 0], (a, b) => b.x - a.x],
    [[-1, -1], (a, b) => (a.x - b.x) && (a.y - b.y)],
    [[1, 1], (a, b) => (b.x - a.x) && (b.y - a.y)],
    [[1, -1], (a, b) => (b.x - a.x) && (a.y - b.y)],
    [[-1, 1], (a, b) => (a.x - b.x) && (b.y - a.y)]
  ])
  const extraSortArr = extraPosArr.sort(getExtraSortMap.get([this.getEqualVal(x1, x2), this.getEqualVal(y1, y2)]))
  this.points.splice(this.pointsLen - 1, 0, ...(extraSortArr.map(item => item.i)))
  this.pointsLen > this.maxLength && this.points.splice(this.maxLength, this.pointsLen - this.maxLength)
}
function getEqualVal (a, b) {
  return a - b === 0 ? 0 : a - b > 0 ? 1 : -1
}
最后找了个星空背景的demo贴到代码中,功能就完成了,关于星空背景的实现感兴趣的可以自己研究一下。
以上就是JS前端使用Canvas快速实现手势解锁特效的详细内容,更多关于JS前端Canvas手势解锁的资料请关注本站其它相关文章!
js-cookie 安装与基础用法:set、get、remove 详解
2026-11-05 16:35:06
适合JavaScript初学者的实战项目:制作简易待办事项列表
2026-11-05 16:17:07
JS打开新标签页时怎么通过URL传递参数
2026-11-05 12:21:08
sigma.js 自定义节点样式:设置颜色、大小及标签显示的技巧
2026-11-05 09:55:00
JS 生成的统计图怎么导出为 PNG 图片或 PDF 文件?
2026-11-05 09:37:58